
You’re a website owner, and the thought of migrating your WordPress site sends a shiver down your spine. Images of lost data, broken links, and frantic calls to your hosting provider flash through your mind. But what if you could move your entire WordPress empire – theme, plugins, content, and all – to a new home without a single minute of downtime? It sounds like magic, but with careful planning and the right approach, it’s entirely achievable. This guide will walk you through the process, empowering you to execute a seamless WordPress site migration, keeping your online presence active and thriving throughout the transition.
The concept of “no downtime” during a WordPress migration isn’t about literally flipping a switch and instantly teleporting your site. Instead, it’s about meticulously orchestrating the process so that at any given moment, there’s always a functional version of your website accessible to your visitors. This requires understanding the core components of your WordPress installation and how they interact, and then strategizing their transfer and activation.
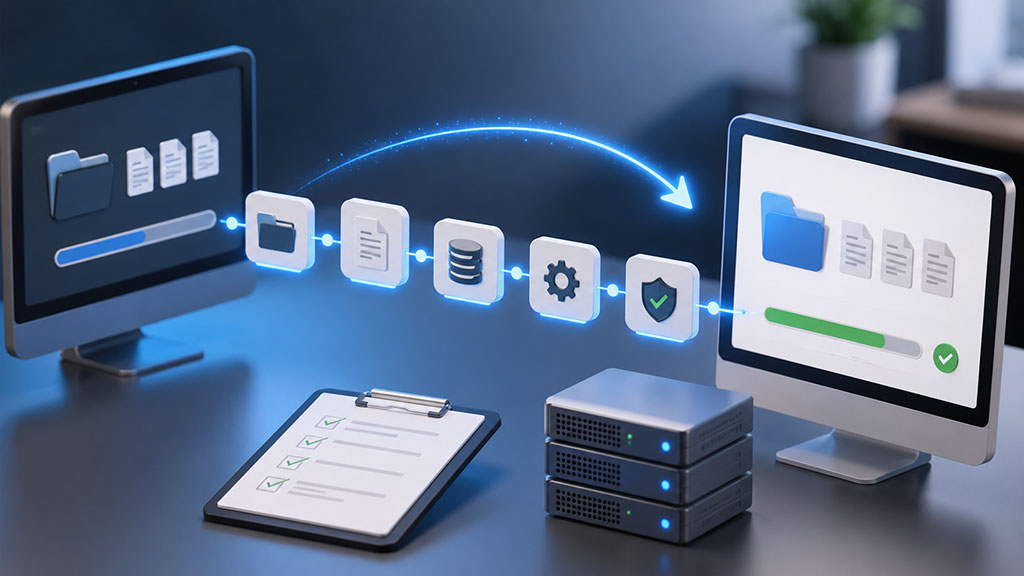
Deconstructing Your WordPress Installation
Before you even think about copying files, you need to understand what you’re moving. Your WordPress site is comprised of several key elements:
- Core WordPress Files: These are the fundamental files that make WordPress function. You’ll usually leave these on the new server and overwrite them with your existing version if there’s a significant difference, but often, replicating them is part of the process.
- Theme Files: This is the visual skin of your website. It dictates the layout, design, and overall aesthetic.
- Plugin Files: These are the workhorses that add functionality to your site, from SEO optimization to e-commerce capabilities.
- Uploads Folder: This is where all your media – images, videos, documents – are stored. This is often the largest part of your data.
- Database: This is the brain of your WordPress site. It stores all your posts, pages, comments, user information, and settings. Migrating the database is arguably the most critical step.
Key Concepts for Seamlessness
Achieving zero downtime hinges on a few core principles:
- Duplication and Staging: You’ll be creating a full copy of your site on the new server before you make it live. This “staging” environment allows you to test everything thoroughly without affecting your current visitors.
- DNS Propagation Management: Domain Name System (DNS) is what translates human-readable domain names (like yourwebsite.com) into IP addresses that computers understand. When you change your DNS records to point to your new server, it takes time for these changes to spread across the internet. Managing this is crucial for a smooth transition.
- Data Synchronization: Ensuring that any changes made to your live site during the migration process are reflected on the new server is vital.
When considering the migration of WordPress sites without downtime, it’s essential to also focus on optimizing your site’s performance to maintain its ranking in search engines. A related article that delves into this topic is titled “Mastering Core Web Vitals: The New Key to Google Rankings.” You can read it for insights on how to enhance your site’s speed and user experience, which are critical factors during and after the migration process. For more information, visit Mastering Core Web Vitals: The New Key to Google Rankings.
Planning Your Migration Strategy: The Blueprint for Success
A well-defined plan is your most powerful tool for a downtime-free migration. Rushing into it without a clear roadmap is a recipe for disaster. This phase is about meticulous preparation and understanding the limitations and requirements of both your current and new hosting environments.
Choosing Your Destination: The New Hosting Environment
The foundation of your new site is your new hosting. Several factors come into play here:
- Performance and Scalability: Will your new host be able to handle your current and future traffic? Look for hosts that offer sufficient resources, SSD storage, and robust infrastructure.
- Security Features: What security measures does your new host provide, such as firewalls, malware scanning, and SSL certificates?
- Support and Reliability: How responsive and knowledgeable is their support team? What is their uptime guarantee?
- Compatibility: Ensure the new hosting environment meets WordPress’s requirements, including PHP version, MySQL/MariaDB version, and adequate memory limits.
Selecting Your Migration Method: Tools of the Trade
There are several ways to approach a WordPress migration, each with its own pros and cons. For a downtime-free migration, you’ll typically lean towards methods that allow for staging and incremental updates.
- Migration Plugins: This is often the most straightforward and recommended approach for most users. Plugins like Duplicator, All-in-One WP Migration, and WP Migrate DB Pro are designed specifically for this purpose and often automate much of the process. You’ll create a package of your site and then deploy it to the new server.
- Manual Migration (with caution): This involves manually copying your files via FTP/SFTP and exporting/importing your database via phpMyAdmin. While it offers granular control, it’s significantly more prone to errors and requires a deeper technical understanding, making it less ideal for a zero-downtime scenario without extreme care.
- Managed Hosting Migration Services: Many hosting providers, especially premium ones, offer free or paid migration services. If your new host provides this, it’s often the easiest route as they handle the heavy lifting and typically guarantee a seamless transition.
Setting Up Your Staging Environment: The Sandbox
This is where the magic of no downtime truly begins. You need a place to build your new site without affecting your live one.
- Subdomain or Temporary URL: Most hosting providers allow you to create a staging site on a subdomain (e.g.,
staging.yourwebsite.com) or via a temporary URL provided by the host. This gives you a separate environment to work in. - Local Development Environment (Optional but Recommended): For ultimate control and offline testing, you can set up a local WordPress environment on your computer using tools like Local by Flywheel, XAMPP, or MAMP. This allows you to make significant changes and test them without any internet dependency.
Executing the Migration: The Step-by-Step Dance
With your plan in place and your staging environment ready, it’s time to get your hands dirty. This phase requires precision and adherence to the steps.
Step 1: Backing Up Everything – The Safety Net
Before you touch a single file or database entry, create a complete backup of your current live WordPress site. This is your ultimate safety net should anything go wrong.
- Full Website Backup: This includes all your WordPress files (themes, plugins, uploads) and your database. You can use your hosting provider’s backup tool, a dedicated WordPress backup plugin, or manual methods.
- Database Backup: Specifically export your WordPress database as a SQL file. This is essential for rebuilding your site.
- WordPress System Files: Ensure you have a copy of your entire WordPress installation directory.
Step 2: Setting Up Your New WordPress Installation (Staging)
Now, you’ll prepare your new hosting environment for your duplicated site.
- Install a Fresh WordPress (Optional but Recommended): Sometimes, it’s cleaner to install a fresh copy of WordPress on your staging environment and then replace its core files and database with your migrated ones. This ensures you’re starting with a clean slate.
- Create a New Database: On your new hosting account, create a new, empty database that will house your migrated WordPress data. Note down the database name, username, and password.
Step 3: Migrating Your Files
This is where you move the bulk of your website’s content.
- Using a Migration Plugin (Recommended):
- Install and activate your chosen migration plugin (e.g., Duplicator, All-in-One WP Migration) on your live site.
- Follow the plugin’s instructions to create a full site package (usually an archive file and an installer script).
- Download these files to your computer.
- Upload the archive and installer files to the root directory of your staging environment (or a subfolder if preferred).
- Access the installer script via your staging URL (e.g.,
staging.yourwebsite.com/installer.php). - Follow the on-screen prompts, providing the database details for your newly created staging database. The plugin will extract your files and import your database.
- Manual File Transfer (FTP/SFTP):
- Connect to your live hosting account using an FTP or SFTP client (e.g., FileZilla).
- Download your entire WordPress directory to your computer. Pay special attention to the
wp-contentfolder (themes, plugins, uploads). - Connect to your new hosting account using FTP/SFTP.
- Upload your downloaded WordPress files to the root directory of your staging environment.
Step 4: Migrating Your Database
This is the heart of your website’s content and settings.
- Using a Migration Plugin (Already done in Step 3 for most plugins): If you used a plugin like Duplicator, this step is integrated into the installation process.
- Manual Database Import (if not using a plugin that handles it):
- Access your live site’s database via phpMyAdmin.
- Export your entire WordPress database as a
.sqlfile. - Access your new staging site’s database via phpMyAdmin.
- Import the
.sqlfile into your newly created staging database. Be very careful to select the correct database.
Step 5: Updating the wp-config.php File
This file tells WordPress how to connect to its database.
- Locate
wp-config.php: This file is in the root directory of your WordPress installation. - Edit the File: Open
wp-config.phpin a text editor. - Update Database Credentials: Change the
DB_NAME,DB_USER, andDB_PASSWORDto match the credentials of your new staging database. You might also need to updateDB_HOSTif your new host uses a different database server address.
Step 6: Testing Thoroughly on the Staging Environment
This is the most critical phase for ensuring no downtime. Your goal is to catch every issue before you go live.
- Browse the Frontend: Navigate through your entire website as a visitor would. Check all pages, posts, archives, and custom post types.
- Test All Functionality:
- Forms: Submit every form on your site (contact forms, comment forms, newsletter sign-ups).
- E-commerce: If you have an e-commerce store, test the entire checkout process, from adding items to the cart to completing a dummy order (use a staging environment that doesn’t process real payments).
- Interactive Elements: Test sliders, accordions, galleries, and any other dynamic content.
- Internal Links: Click on every internal link to ensure they point to the correct pages on your staging site.
- External Links: Verify that external links are functioning correctly.
- Media Library: Check that all images and other media are loading correctly.
- Check SEO Elements:
- Permalinks: Ensure your permalink structure is consistent and working.
- Meta Descriptions and Titles: Verify that they are displayed correctly.
- Robots.txt and Sitemap: Check for any issues with these files.
- Admin Area Functionality: Log in to the WordPress admin dashboard (
staging.yourwebsite.com/wp-admin). - Create New Content: Try creating a new post and page.
- Edit Existing Content: Edit a few existing posts and pages.
- Plugin Settings: Review the settings of your critical plugins.
- Theme Customizer: Check if the theme customizer works as expected.
- Cross-Browser and Cross-Device Testing: View your staging site on different browsers (Chrome, Firefox, Safari, Edge) and devices (desktop, tablet, mobile) to ensure it’s responsive and displays correctly everywhere.
Step 7: Handling Content Updates During Migration (The Zero Downtime Trick)
If your site is active and receiving new comments or orders during your migration, you need a way to capture these changes.
- Maintenance Mode: The simplest way to prevent new data from being added to your live site while you’re making the final switch is to put your live site into maintenance mode. This informs visitors that the site is temporarily unavailable for updates. Many plugins can help with this, or you can do it manually by placing a
maintenance.htmlfile in your WordPress root. - Database Synchronization (Advanced): For highly active sites, you might consider incremental database synchronization tools or careful timing of your DNS change so that the window of potential data loss is minimal. This is where a managed service from your host can be invaluable.
- Last-Minute Data Transfer: After your main migration, if you’ve had activity since your initial database export, you’ll need to perform a final, quick database dump and import to catch those last few entries. This needs to be done very quickly, ideally just before you change your DNS.
The Go-Live Moment: The Grand Unveiling

This is the moment of truth. You’ve tested everything on your staging site, and you’re confident. Now, you’ll point your domain name to your new server.
Step 1: Updating Your DNS Records
This is the decisive step that redirects your domain to your new hosting.
- Access Your Domain Registrar: Log in to the account where you registered your domain name (e.g., GoDaddy, Namecheap, Google Domains).
- Locate DNS Management: Find the section for managing your domain’s DNS records.
- Change A Records: You’ll need to update your A records to point to the IP address of your new hosting server. Your hosting provider will have given you this IP address.
- Update Nameservers (If applicable): If you’ve changed your hosting provider and are using their nameservers, you’ll update your nameserver records to point to your new host’s nameservers.
- TTL (Time To Live): The TTL value determines how long DNS resolvers cache your records. For migration, it’s often recommended to set a low TTL beforehand (e.g., 300 seconds or 5 minutes) so that changes propagate faster. After the migration is complete, you can increase it again.
Step 2: Navigating DNS Propagation
This is the part where patience is a virtue. DNS changes don’t happen instantly across the entire internet.
- What is DNS Propagation? When you update your DNS records, these changes need to be communicated to DNS servers worldwide. This process can take anywhere from a few minutes to 48 hours, though it’s usually much faster for most users.
- Checking Propagation: You can use online tools like
whatsmydns.netto check how your DNS changes are propagating across different regions. - Clearing Your Local DNS Cache: Your computer also caches DNS information. Clearing your local DNS cache can sometimes help you see the updated site faster.
Step 3: Final Checks on the Live Site
Once you start seeing your site load from the new server, perform one last round of critical checks.
- Browse the Frontend Again: Just as you did on staging, quickly browse key pages and test critical functionality.
- Login to Admin: Ensure you can still access your WordPress admin area.
- Check for Mixed Content Warnings: If you’re migrating to HTTPS, ensure there are no “mixed content” warnings in your browser’s developer console, which indicate that some resources are still being loaded over HTTP.
When considering the process of migrating WordPress sites without downtime, it’s also important to think about the hosting environment that will support your website’s performance. For instance, you might find that dedicated hosting offers significant advantages for your site’s stability and speed. To learn more about why dedicated hosting is the perfect solution for your website, you can read this insightful article here. This knowledge can help ensure a seamless transition during your migration process.
Post-Migration Tasks: Housekeeping and Optimization
The migration is technically complete once your domain points to the new server and your site is functioning. However, there are a few essential post-migration tasks to ensure everything runs smoothly and efficiently.
Step 1: Updating Internal Links (If Necessary)
If you used absolute URLs in your content that pointed to your old staging URL or temporary URL, you might need to update them.
- Search and Replace Plugin: Tools like Better Search Replace are invaluable here. You can use them to search for old URLs (e.g.,
http://staging.yourwebsite.com) and replace them with your live domain (https://www.yourwebsite.com). Be very careful and always back up your database before running these operations. - Plugin-Specific Settings: Some plugins might store URLs in their own settings or option tables. You might need to go through these individually.
Step 2: Resetting Permalinks
A common troubleshooting step after a migration.
- Navigate to Settings > Permalinks: In your WordPress admin dashboard, go to this section.
- Save Changes: Even if you don’t change anything, simply re-saving your permalink settings can often fix broken links and ensure everything is correctly configured on the new server.
Step 3: Removing the Old Site (with Caution)
Once you are absolutely certain that your new site is stable and there are no issues, you can begin to remove your old installation.
- Keep a Backup: Always keep a backup of your old site for a reasonable period, just in case.
- Clean Up Staging Environment: If you used a staging subdomain, you can now safely delete it and its associated files and database.
- Decommission Old Hosting: Once you’re fully satisfied, you can cancel your old hosting account.
Step 4: Ongoing Monitoring and Optimization
Your migration is complete, but your work isn’t done.
- Performance Monitoring: Keep an eye on your site’s loading speed and overall performance. Leverage tools like Google PageSpeed Insights and GTmetrix.
- Security Scans: Regularly scan your site for malware and security vulnerabilities.
- Regular Backups: Continue with a robust backup strategy on your new hosting.
- Content Updates: Resume your regular content creation and website maintenance.
By following these steps methodically, you can transform the daunting task of WordPress migration into a smooth, professional operation that keeps your website accessible and earning for your audience throughout the entire process. Remember, preparation, thorough testing, and a little patience are your greatest allies in achieving a truly seamless WordPress site migration with zero downtime.
FAQs
1. What is WordPress migration?
WordPress migration is the process of moving a WordPress website from one hosting provider to another, or from one domain to another, without causing any downtime or loss of data.
2. Why is it important to migrate WordPress sites without downtime?
Migrating WordPress sites without downtime is important because it ensures that your website remains accessible to visitors and customers throughout the migration process. Downtime can lead to loss of traffic, potential customers, and revenue.
3. What are the common methods for migrating WordPress sites without downtime?
Common methods for migrating WordPress sites without downtime include using a migration plugin, manually transferring files and databases, using a staging environment, and utilizing a content delivery network (CDN) to serve the website during the migration process.
4. What are the potential challenges of migrating WordPress sites without downtime?
Potential challenges of migrating WordPress sites without downtime include ensuring that all files and databases are transferred accurately, managing DNS changes, maintaining website performance, and handling any unforeseen technical issues that may arise during the migration process.
5. What are some best practices for migrating WordPress sites without downtime?
Best practices for migrating WordPress sites without downtime include thoroughly testing the migration process in a staging environment, communicating with stakeholders about the migration timeline, implementing redirects and monitoring website performance post-migration, and having a backup plan in case of any unexpected issues.


Add comment