
You’ve decided to empower your online presence with WordPress, a fantastic choice! WordPress is renowned for its flexibility, user-friendliness, and extensive community support. While manually installing WordPress can be a bit technical, using cPanel and Softaculous simplifies the process dramatically, making it accessible even for beginners. This comprehensive guide will walk you through each step, ensuring you have your WordPress site up and running in no time.
Before you dive into the installation, let’s briefly clarify what cPanel and Softaculous are and why they’re your best friends in this journey.
What is cPanel?
cPanel is a web-based control panel that simplifies website and server management. Think of it as your website’s dashboard, providing a graphical interface and automation tools designed to make the process of hosting a website easier. Through cPanel, you can manage your website files, databases, email accounts, security settings, and much more, all without needing advanced technical knowledge. Most web hosting providers offer cPanel as part of their hosting packages, especially shared hosting.
What is Softaculous?
Softaculous is an auto-installer library that integrates seamlessly with cPanel. It’s like a app store for your website. Instead of manually downloading and configuring popular web applications like WordPress, Joomla, Drupal, and many others, Softaculous automates the entire installation process. With just a few clicks, it creates necessary databases, downloads the core files, and sets up your application, saving you significant time and effort. Its user-friendly interface makes it the preferred method for many beginners and even experienced developers for quick deployments.
If you’re looking to enhance your WordPress site after installation, you might find it beneficial to explore the importance of integrating a blog into your e-commerce platform. A related article that delves into this topic is titled “Why Your E-Commerce Website Needs a Blog,” which discusses how blogging can drive traffic and improve customer engagement. You can read it here: Why Your E-Commerce Website Needs a Blog.
Prerequisites: What You Need Before You Start
Before you embark on your WordPress installation, there are a few essential things you’ll need to have in place. Ensuring these are ready will make the installation process smooth and hassle-free.
A Web Hosting Account
This is fundamental. You need a web hosting provider that offers cPanel. Many reputable hosts like Bluehost, SiteGround, HostGator, and WP Engine (though WP Engine specialized hosting might not always use traditional cPanel) provide cPanel as standard. If you don’t have one, you’ll need to sign up for a hosting package. During this process, you’ll typically choose a plan and register a domain name.
A Registered Domain Name
Your domain name is your website’s address on the internet (e.g., yourwebsite.com). You’ll usually register this when you sign up for your hosting account, or you can register it separately with a domain registrar and then point it to your hosting provider’s nameservers. Ensure your domain is properly pointed and propagated – this usually takes a few hours but can sometimes take up to 48 hours. If you’re unsure if your domain has propagated, you can use online tools to check.
Your cPanel Login Credentials
Once your hosting account is set up, your provider will send you an email containing your cPanel login details. This typically includes a URL (often something like yourdomain.com/cpanel or cpanel.yourdomain.com), a username, and a password. Keep these credentials in a safe place, as you’ll need them frequently.
Step-by-Step Installation: Getting WordPress Up and Running
Now that you have all the necessary components, it’s time to install WordPress. Follow these steps carefully, and you’ll have your site live in no time.
Step 1: Log in to Your cPanel Account
Open your web browser and navigate to your cPanel login URL provided by your hosting provider. Enter your cPanel username and password in the respective fields and click “Log in.”
You’ll be greeted by the cPanel dashboard, an interface filled with various icons and sections. Don’t be overwhelmed; you’re looking for a specific section.
Step 2: Locate Softaculous Apps Installer
Once you’re logged into cPanel, scroll down until you find a section usually labeled “Software,” “Software/Services,” or “Softaculous Apps Installer.” Within this section, you’ll see an icon for “WordPress.” Alternatively, you can use the search bar at the top of cPanel and type “Softaculous” or “WordPress” to quickly locate it.
Click on the “WordPress” icon to launch the Softaculous WordPress installer.
Step 3: Initiate the WordPress Installation Process
After clicking the WordPress icon, you’ll be taken to the Softaculous WordPress overview page. Here, you’ll find information about WordPress, including features, ratings, and a link to its official website.
To begin the installation, click on the “Install Now” button, which is usually prominently displayed.
Step 4: Configure Your WordPress Installation Settings
This is the most crucial step where you define how your WordPress site will be set up. Softaculous provides a series of settings you need to configure. Take your time and fill out each field accurately.
Choose Installation URL
- Choose Protocol: You have several options here:
http://,http://www.,https://, andhttps://www. For security and SEO, you should always choosehttps://(orhttps://www) if your hosting provider offers an SSL certificate. Most modern hosting plans include free SSL certificates (like Let’s Encrypt). If you’re unsure, selecthttps://. - Choose Domain: From the dropdown menu, select the domain name on which you want to install WordPress. If you have multiple domains or subdomains configured with your hosting, ensure you select the correct one.
- In Directory: This field specifies where WordPress will be installed relative to your domain. Leave this blank if you want WordPress to be accessible directly from your main domain (e.g.,
yourwebsite.com). If you enter something likebloghere, your WordPress site will be accessible atyourwebsite.com/blog. For your primary website, it’s almost always best to leave this empty.
Site Settings
- Site Name: Enter the title of your website (e.g., “My Awesome Blog,” “Tech Reviews HQ”). You can change this later from your WordPress dashboard.
- Site Description: Provide a brief tagline or description of your website (e.g., “Your go-to source for the latest tech news”). This can also be changed later.
- Enable Multi-site (WPMU): Unless you specifically know you need a WordPress multi-site network (for managing multiple distinct sites from a single WordPress installation), leave this unchecked. For most users, a standard single-site installation is sufficient.
Admin Account
This section is vital for your site’s security. Create strong credentials that are difficult to guess.
- Admin Username: Choose a unique username. Avoid common usernames like
adminorrootas they are frequent targets for hackers. Think of something less obvious. - Admin Password: Create a very strong password. Use a combination of uppercase and lowercase letters, numbers, and symbols. Softaculous usually has a password strength indicator to help you.
- Admin Email: Enter a valid email address that you have access to. This will be used for administrative notifications, password resets, and important updates.
Choose Language
- Select Language: Choose the primary language for your WordPress installation. English is the default, but you can select from many other languages if preferred.
Select Plugins (Optional)
Softaculous might offer to install some plugins by default, such as “Limit Login Attempts” or “Classic Editor.” You can choose to install them or leave them unchecked. Most basic websites don’t require these immediately, and you can always install plugins later from within your WordPress dashboard.
Advanced Options (Optional)
You’ll usually see an “Advanced Options” section that you can expand. While you generally don’t need to change these for a basic installation, it’s good to understand them.
- Database Name: Softaculous automatically generates a database name for your WordPress installation. You can leave the default.
- Table Prefix: WordPress uses a table prefix for its database tables (e.g.,
wp_). Changing this to something less common (e.g.,myblog_or a random string) adds a minor layer of security by making it harder for automated attacks to guess your database table names. - Disable Update Notifications: It’s generally recommended to leave this unchecked so you receive notifications about WordPress updates, which are crucial for security and functionality.
- Auto Upgrade: You can choose to enable auto-updates for WordPress core, themes, and plugins. While convenient, some users prefer to manually update to avoid compatibility issues. For beginners, auto-upgrading minor versions (e.g., 5.8.0 to 5.8.1) is generally safe, but major versions usually require manual review.
- Backup Location / Auto Backups: Softaculous allows you to configure automatic backups. It’s highly recommended to enable auto backups and choose a suitable rotation frequency. Regular backups are your safety net in case anything goes wrong.
Select Theme (Optional)
Softaculous might offer a selection of free themes you can install immediately. You can browse them and select one if you like, or you can choose to skip this and install a theme later from your WordPress dashboard. WordPress comes with a default theme (usually “Twenty Twenty-Four” or similar), so you’ll have a functional site regardless.
Step 5: Finalize the Installation
Once you’ve reviewed all the settings and are satisfied with your choices, scroll to the bottom of the page.
- Email installation details to: Enter an email address where you’d like Softaculous to send the installation details, including your admin URL, username, and password (though the password will likely be obscured for security). This is a good way to keep a record of your setup.
Click the “Install” button.
Softaculous will now process your request. This typically takes a few moments, during which it will download the WordPress files, create the database, and configure everything. You’ll see a progress bar indicating the status.
Step 6: Confirmation and Accessing Your New WordPress Site
Once the installation is complete, Softaculous will display a success message, typically stating: “Congratulations, the software was installed successfully.”
You’ll be provided with two important links:
- Your Website URL: This is the front-end of your WordPress site (e.g.,
https://yourwebsite.com). Click this to see your new site live! - WordPress Administration URL: This is your WordPress dashboard login page (e.g.,
https://yourwebsite.com/wp-admin). This is where you’ll manage all aspects of your website, from creating content to installing plugins and changing themes.
Click on the WordPress Administration URL to log into your new WordPress dashboard. Use the Admin Username and Admin Password you set in Step 4.
Post-Installation Essentials: What to Do Next
Congratulations! You’ve successfully installed WordPress. But the journey doesn’t end there. Here are some crucial steps you should take immediately after installation to secure and optimize your site.
Explore Your WordPress Dashboard
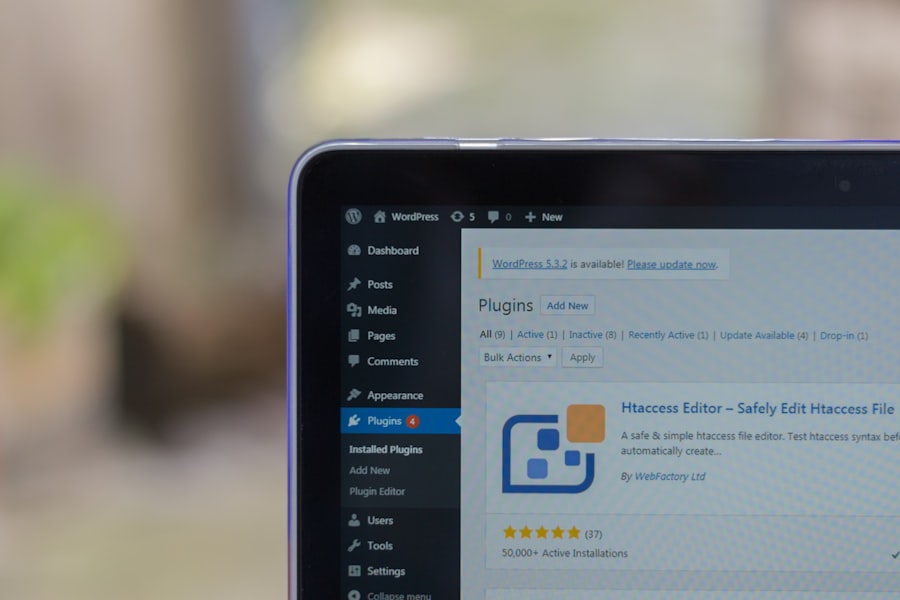
Spend some time familiarizing yourself with the WordPress dashboard. Navigate through the menus on the left sidebar: Posts, Pages, Comments, Appearance, Plugins, Users, Tools, and Settings. Understanding where everything is located will make managing your site much easier.
Update Core, Themes, and Plugins
Even with a fresh installation, there might be minor updates available. It’s paramount to keep your WordPress core, themes, and plugins updated to the latest versions. Updates often include security patches, bug fixes, and new features.
- Go to Dashboard > Updates. If any updates are available, install them.
Configure General Settings
Navigate to Settings > General. Here, you can reconfirm your Site Title and Tagline, and ensure your WordPress Address (URL) and Site Address (URL) are correct (especially if you chose https). You can also change the admin email, time zone, date format, and week start day.
Set Your Permalinks
Permalinks are the permanent URLs to your individual posts and pages. By default, WordPress might use less user-friendly URLs (e.g., yourwebsite.com/?p=123). Changing them to a more readable format is crucial for both user experience and SEO.
- Go to Settings > Permalinks.
- The most common and recommended option is “Post Name”. Select this and click “Save Changes.”
Install an SEO Plugin
To help search engines find and rank your content, an SEO plugin is indispensable. Popular choices include Yoast SEO and Rank Math.
- Go to Plugins > Add New.
- Search for “Yoast SEO” or “Rank Math.”
- Click “Install Now” next to your chosen plugin, then “Activate.”
- Follow the plugin’s setup wizard to configure basic SEO settings.
Choose and Customize Your Theme
Your theme dictates the visual appearance of your website. While Softaculous might have installed a default theme, you’ll likely want to choose one that aligns with your brand and purpose.
- Go to Appearance > Themes.
- Click “Add New” to browse thousands of free themes in the WordPress repository. You can also upload a premium theme you’ve purchased.
- Once you’ve installed and activated a theme, click on “Customize” (under Appearance) to adjust its settings, colors, fonts, and layout.
Install Essential Plugins
Beyond SEO, consider these essential plugins for a well-rounded website:
- Security Plugin: Wordfence Security or Sucuri Security to protect your site from malware and attacks.
- Backup Plugin: UpdraftPlus or BackupBuddy for scheduled and automated backups. While Softaculous offers backups, having an additional layer of backup controlled within WordPress is always a good idea.
- Contact Form Plugin: Contact Form 7 or WPForms to create easy-to-use contact forms for your visitors.
- Caching Plugin: WP Super Cache or W3 Total Cache to improve your website’s loading speed.
Delete Default Content
WordPress comes with a default post (“Hello world!”), a default page (“Sample Page”), and a default comment. It’s a good practice to delete these to clean up your site.
- Go to Posts > All Posts and trash “Hello world!”.
- Go to Pages > All Pages and trash “Sample Page.”
- Go to Comments and moderate or trash the default comment.
When setting up your WordPress site using cPanel and Softaculous, it’s also essential to consider how to enhance your online presence effectively. A great resource to explore is an article that discusses the importance of reliable web hosting services, which can significantly impact your site’s performance and user experience. You can read more about it in this informative piece on how to maximize your online presence with the right hosting solutions. This knowledge will complement your WordPress installation process and help ensure your website runs smoothly.
Troubleshooting Common Issues
| Steps | Details |
|---|---|
| Step 1 | Log in to your cPanel account |
| Step 2 | Scroll down to the ‘Softaculous Apps Installer’ section |
| Step 3 | Click on the WordPress icon |
| Step 4 | Click the ‘Install Now’ button |
| Step 5 | Fill in the WordPress installation details |
| Step 6 | Click the ‘Install’ button |
| Step 7 | WordPress is now installed and ready to use |
While Softaculous makes installation straightforward, you might occasionally encounter minor hiccups. Here are a few common issues and their solutions.
“Error Establishing a Database Connection”
This is a common error indicating that WordPress cannot connect to its database.
- Check Database Credentials: The most frequent cause. Although Softaculous handles this, if you edited settings or manually tinkered with
wp-config.php, ensure the database name, username, and password are correct. - Database Server Status: Less common for shared hosting, but sometimes the database server might be temporarily down. Contact your hosting provider.
- Corrupted Database: Rarely, the database can become corrupted. A full restore from a backup might be necessary.
Blank White Screen (White Screen of Death – WSOD)
This usually means there’s a PHP error preventing your site from loading.
- Check Your
wp-config.phpfile: Ensure there are no accidental extra spaces or characters, especially at the very beginning or end. - Disable Plugins/Themes: If the WSOD appeared after installing a new plugin or theme, try renaming its folder via FTP/File Manager (e.g.,
wp-content/plugins/bad-plugintowp-content/plugins/bad-plugin_old). This effectively deactivates it. - Enable Debugging: Add
define('WP_DEBUG', true);anddefine('WP_DEBUG_LOG', true);to yourwp-config.phpfile. This will usually display the error message on the screen or log it to a file (wp-content/debug.log), giving you a clue about the problem.
Internal Server Error (500 Error)
This is a generic server error that can have various causes.
- Corrupted
.htaccessfile: Go to your cPanel File Manager, locate yourpublic_html(or your domain’s root) folder, and rename the.htaccessfile to something like.htaccess_old. Then, go to Settings > Permalinks in your WordPress dashboard and simply click “Save Changes” to generate a new.htaccessfile. - PHP Memory Limit: Your server might be running out of memory. You can try increasing the PHP memory limit. In your
wp-config.phpfile, adddefine('WP_MEMORY_LIMIT', '256M');.
Forgotten Admin Password
Don’t panic! You can reset it.
- Via WordPress Login Page: Click “Lost your password?” on the login screen and follow the instructions to receive a reset link in your admin email.
- Via cPanel/phpMyAdmin: If the email method isn’t working, you can manually reset the password directly in your database using phpMyAdmin in cPanel. This is a bit more advanced, but there are many tutorials available online if you search for “reset WordPress password phpMyAdmin.”
Remember, when in doubt, your web hosting provider’s support team is a great resource. They can often diagnose and resolve issues much faster, especially those related to server configurations.
You’ve now successfully navigated the world of cPanel and Softaculous to install WordPress, and you’re well-equipped to start building your online presence. The WordPress journey is exciting and rewarding, offering endless possibilities for creativity and functionality. Keep learning, keep exploring, and enjoy developing your website!
FAQs
What is WordPress?
WordPress is a popular content management system (CMS) that allows users to create and manage websites easily. It is known for its user-friendly interface and customizable features.
What is cPanel?
cPanel is a web hosting control panel that provides a graphical interface and automation tools designed to simplify the process of hosting a website. It allows users to manage their website, email accounts, and other aspects of web hosting.
What is Softaculous?
Softaculous is a script installer that automates the installation of web applications, such as WordPress, on a website. It provides a user-friendly interface for installing, updating, and managing various web applications.
How do I install WordPress with cPanel and Softaculous?
To install WordPress with cPanel and Softaculous, you can log in to your cPanel account, navigate to the Softaculous Apps Installer section, and select WordPress. Then, follow the on-screen instructions to complete the installation process.
What are the benefits of using cPanel and Softaculous to install WordPress?
Using cPanel and Softaculous to install WordPress offers several benefits, including a user-friendly interface, automated installation process, and easy management of WordPress updates and backups. It also provides access to a wide range of plugins and themes for customizing your WordPress website.







Add comment