

Welcome, aspiring webmaster, to the exciting world of WordPress Toolkit! If you’re looking to launch or manage a WordPress website without getting bogged down in command-line code or complex configurations, you’ve come to the right place. This guide is your stepping stone, designed to transform you from a WordPress novice into a confident site administrator, all with the power of WordPress Toolkit at your fingertips.
WordPress Toolkit is a powerful interface often integrated into your web hosting control panel, such as cPanel or Plesk. Its primary purpose is to simplify the management of your WordPress installations, offering a centralized hub for tasks that would otherwise require accessing individual WordPress dashboards, FTP, or even SSH. Think of it as a control center, streamlining your workflow and giving you unprecedented command over your WordPress empire.
What is WordPress Toolkit and Why Should You Care?
Before we dive into the practicalities, let’s understand why WordPress Toolkit is such a game-changer. Imagine juggling multiple WordPress sites – each with its own updates, backups, security checks, and plugin management. Without a centralized tool, this can quickly become a logistical nightmare. WordPress Toolkit is designed to alleviate this stress. It provides a clean, intuitive dashboard where you can:
- Install WordPress: Gone are the days of manual database creation and file uploads. Toolkit automates the entire installation process.
- Manage Themes and Plugins: Update, activate, deactivate, or delete themes and plugins across your sites with ease.
- Handle Security: Implement security hardening measures and monitor for vulnerabilities.
- Create Backups and Restores: Safeguard your site data with automated or on-demand backups.
- Clone and Staging: Create development environments to test changes before pushing them live.
- Troubleshoot and Debug: Identify and resolve common WordPress issues.
- Optimize Performance: Improve your site’s speed and efficiency.
In essence, WordPress Toolkit empowers you to focus on creating great content and engaging with your audience, rather than getting bogged down in the technical minutiae of website maintenance. It’s a productivity booster for anyone managing one or many WordPress sites.
Your journey with WordPress Toolkit begins by locating it within your web hosting control panel. The exact steps may vary slightly depending on your host (cPanel, Plesk, etc.), but the general principle remains the same.
Locating WordPress Toolkit in Your Control Panel
Once you log in to your web hosting control panel, scan for an icon or link labeled something like “WordPress Toolkit,” “WordPress Manager,” or simply “WordPress.” It’s usually prominently displayed in the “Software” or “Applications” section. Click on it to launch the Toolkit interface.
Navigating the Main Dashboard
Upon entering WordPress Toolkit, you’ll be greeted by a dashboard that provides an overview of your WordPress installations. If you have multiple sites, you’ll see a list of them, each with its own set of management options. Take a moment to familiarize yourself with the layout.
The main dashboard typically presents a list of your WordPress installations. For each installation, you’ll often see:
- Installation Name/Domain: Identifies the specific WordPress site.
- WordPress Version: Tells you which version of WordPress is running.
- Security Status: A quick indicator of your site’s security posture.
- Updates Available: Notifies you if there are pending updates for WordPress core, themes, or plugins.
- Actions Menu: A crucial dropdown or set of buttons that provides direct access to management tasks.
Understanding Key Toolkit Features Overview
Before we delve into specific actions, let’s briefly touch upon some of the common features you’ll find throughout the Toolkit interface. These are your primary tools for managing your WordPress sites.
- One-Click Installation: As the name suggests, this feature allows you to install a fresh WordPress instance with just a few clicks. You’ll typically provide basic information like your domain, an admin username, and password.
- Updates Management: This centralizes all your WordPress, theme, and plugin updates. You can update individual components or perform bulk updates across multiple sites. This saves you significant time compared to logging into each WordPress dashboard separately.
- Security Hardening: This feature offers a suite of security recommendations and one-click fixes to reinforce your website’s defenses. It might suggest things like disabling XML-RPC, preventing directory browsing, or enabling two-factor authentication.
- Backup & Restore: This is your safety net. You can create manual backups of your entire WordPress installation (files and database) or schedule automated backups to run regularly. In case of disaster, restoring a previous backup is equally straightforward.
- Cloning & Staging: These advanced features are incredibly useful for development and testing. Cloning creates an identical copy of your website, while staging allows you to create a temporary, private version of your site to test changes before applying them to your live site.
- Debugging Tools: For troubleshooting errors, the Toolkit often provides access to WordPress debugging logs, allowing you to pinpoint the source of issues more easily.
- Performance Optimization: Some Toolkit versions offer features to improve your site’s loading speed, such as caching integration or database optimization tools.
If you’re looking to enhance your WordPress experience, the WordPress Toolkit Guide for Beginners is an excellent resource. It provides essential tips and tools for managing your WordPress site effectively. Additionally, if you’re considering moving your website to a new hosting provider, you might find this related article helpful: How to Migrate Your Website to a New Web Hosting Provider: A Step-by-Step Guide. This guide offers a comprehensive overview of the migration process, ensuring a smooth transition for your website.
Installing Your First WordPress Site with WordPress Toolkit
Now that you’re familiar with the interface, let’s get down to business: installing your very first WordPress site. This process is remarkably simple, designed to be accessible even for complete beginners.
Initiating a New WordPress Installation
On your WordPress Toolkit dashboard, look for a prominent button or link labeled something like “Install,” “Install WordPress,” or “New Installation.” Clicking this typically launches an installation wizard.
Configuring Installation Settings
The wizard will guide you through a few essential configuration options. Don’t worry, most of these have sensible defaults, but it’s good to understand what you’re setting up.
- Installation Path/Domain: This is where you specify the domain or subdomain where you want WordPress to be installed. If you want it on your main domain (e.g.,
yourdomain.com), select that option. If you want it in a subdirectory (e.g.,yourdomain.com/blog), you can usually specify that here. - Website Title: This is the public title of your website, which will appear in browser tabs and search results. You can always change this later from your WordPress dashboard.
- WordPress Administrator Details: This is crucial. You’ll need to set up a username, password, and email address for your WordPress administrator account. Choose a strong, unique password!
- Database Settings: In most cases, WordPress Toolkit will automatically create a new database for your installation. You typically don’t need to worry about this unless you have specific reasons to use an existing database.
- Theme Selection (Optional): Some Toolkit versions offer an option to pre-select a theme during installation. If you have a specific theme in mind, you can choose it here, otherwise, the default WordPress theme (like Twenty Twenty-Four) will be installed.
- Plugin Selection (Optional): Similarly, you might be offered a selection of popular plugins to install automatically. It’s often best to stick with the essentials and add more plugins as needed later.
Completing the Installation and Accessing Your New Site
Once you’ve filled in all the necessary details, click “Install” or “Finish.” WordPress Toolkit will then work its magic, typically taking just a few moments to set up your entire WordPress installation.
After the installation is complete, you’ll usually see a confirmation message and direct links to:
- Your new WordPress website: The front-end of your site, visible to visitors.
- Your WordPress admin dashboard: The backend where you’ll manage your content, themes, plugins, and settings.
Bookmark the admin dashboard URL! It will typically be yourdomain.com/wp-admin or yourdomain.com/subdirectory/wp-admin. Use the administrator username and password you just created to log in. Congratulations, you’ve just launched your first WordPress site using WordPress Toolkit!
Managing Your WordPress Installations: Updates, Security, and Backups
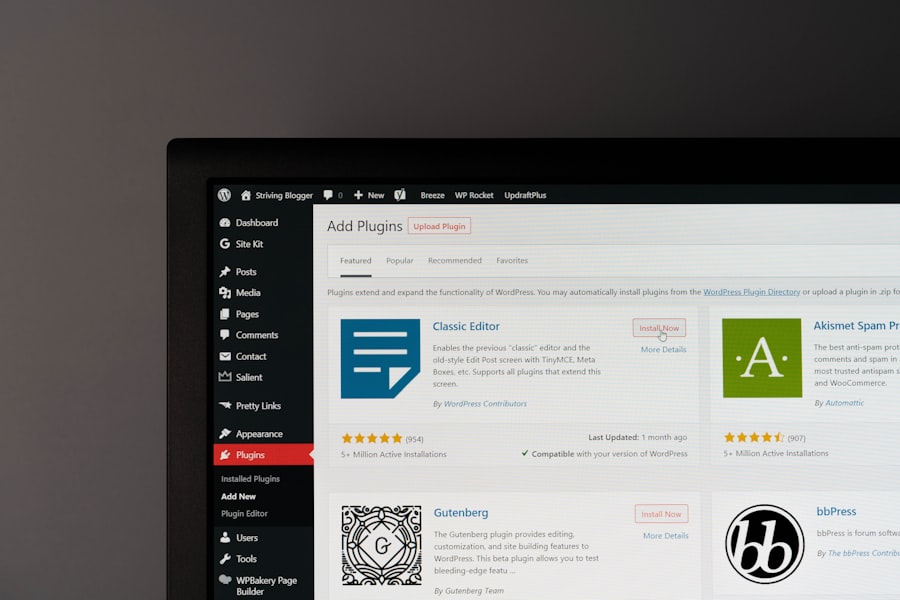
Now that you have a WordPress site up and running, let’s explore the core management features that WordPress Toolkit provides. This section covers the essential tasks for keeping your site healthy, secure, and up-to-date.
Keeping WordPress, Themes, and Plugins Up-to-Date
Timely updates are paramount for both security and functionality. WordPress Toolkit makes this process incredibly efficient.
- Checking for Updates: On your main WordPress Toolkit dashboard, you’ll see a clear indication if any updates are available for your WordPress core, themes, or plugins. Often, an “Updates Available” section or a notification badge will highlight pending updates.
- Performing Single or Bulk Updates: You can click on an individual installation to see detailed update information. From there, you’ll have options to update specific themes or plugins, or update everything at once. For multiple sites, you can often select all installations and perform a bulk update, saving you immense time.
- Understanding Update Risks: While updates are crucial, sometimes they can introduce unforeseen conflicts or bugs. WordPress Toolkit often provides warnings about compatibility or recommends creating a backup before proceeding with major updates. Always heed these warnings!
Enhancing Your Site’s Security with Toolkit Features
Security is not a luxury; it’s a necessity. WordPress Toolkit offers powerful tools to harden your site’s defenses.
- Security Hardening Recommendations: Navigate to the security section for your WordPress installation. Here, you’ll typically find a list of recommended security measures. These might include:
- Disable XML-RPC: A common exploit vector for brute-force attacks.
- Prohibit file editing in WP-Admin: Prevents direct editing of theme and plugin files from the WordPress dashboard, adding a layer of security.
- Prevent directory browsing: Stops visitors from seeing the contents of your website directories.
- Change default database prefix: Makes it harder for attackers to guess your database table names.
- Protect wp-config.php: A critical file that holds your database credentials.
- One-Click Security Fixes: Many of these recommendations can be implemented with a single click. Keep an eye on the security status indicator; applying these fixes will often improve your site’s overall security score.
- Monitoring Security Status: WordPress Toolkit often provides a quick overview of your site’s security posture, letting you know at a glance if there are any critical vulnerabilities or unapplied security measures.
Implementing a Robust Backup and Restore Strategy
Backups are your ultimate safety net. Accidents happen, updates fail, and sometimes, even well-meaning changes can break your site. WordPress Toolkit simplifies the backup process significantly.
- Creating Manual Backups: From your WordPress installation’s management panel, you’ll typically find a “Backup” or “Backup/Restore” option. Clicking this allows you to initiate a manual backup of your entire site, including files and the database. Label your backups clearly so you know what they contain (e.g., “Pre-update backup,” “Pre-design change”).
- Scheduling Automated Backups: For continuous protection, look for options to schedule automated backups. You can often set the frequency (daily, weekly, monthly) and the number of backups to retain. This ensures you always have a recent version of your site stored safely.
- Restoring from a Backup: In the unfortunate event that you need to revert your site, the “Restore” function is your savior. You’ll be presented with a list of your available backups. Select the one you wish to restore from, and WordPress Toolkit will handle the process, bringing your site back to its previous state. Always confirm which parts you are restoring (files, database, or both) to avoid accidental data loss.
Advanced Features: Cloning, Staging, and Debugging
Beyond the essential management tasks, WordPress Toolkit offers a suite of advanced features that are invaluable for developers, designers, and anyone looking to maintain a professional and resilient online presence.
Leveraging Cloning for Development and Testing
Cloning creates an exact duplicate of your existing WordPress website. This is incredibly useful for a variety of scenarios.
- Creating a Development Environment: You can clone your live site to a subdomain (e.g.,
dev.yourdomain.com) or a subdirectory. This allows you to experiment with new plugins, themes, or custom code without affecting your live website. - Migrating Sites: Cloning can also be a preliminary step if you’re looking to migrate a site to a different domain or server, allowing you to test the setup before making the final switch.
- Creating Template Sites: If you build multiple WordPress sites with similar foundations, cloning a “template” site can save you a tremendous amount of setup time.
To clone your site, locate the “Clone” option within your WordPress installation’s management tools. You’ll usually be asked to specify the destination for the clone (a new domain, subdomain, or directory).
Utilizing Staging Environments for Safe Updates and Redesigns
Staging is a specialized form of cloning, but with an added layer of integration. A staging environment is a private copia of your live site where you can safely test changes.
- Testing Major Updates: Before updating WordPress core to a major version, or pushing a significant theme or plugin update, create a staging site. This allows you to thoroughly test the updates and identify any compatibility issues or bugs without risking your live site’s stability.
- Redesigning Your Website: Planning a major redesign? Do it on a staging site! You can work on the new layout, content, and functionality in private. Once you’re satisfied, WordPress Toolkit often provides a “Sync” or “Push to Live” feature that seamlessly transfers your changes from the staging site to your live site, minimizing downtime and disruption.
- Bug Fixing: If you encounter a persistent bug on your live site, a staging environment allows you to isolate and troubleshoot the problem without affecting your users.
Look for the “Staging” or “Create Staging” option. The process is usually guided, allowing you to create the staging site and later synchronize changes back to the live version.
Mastering Debugging Tools for Troubleshooting
Even with the best planning, issues can arise. WordPress Toolkit provides access to debugging tools that can help you diagnose and resolve common WordPress problems.
- Enabling WordPress Debugging: Some Toolkit versions offer a one-click option to enable WordPress’s built-in debugging mode. When enabled, WordPress will log errors, warnings, and notices, often revealing the source of a problem.
- Accessing Log Files: You’ll typically find an option to view WordPress error logs or other relevant server logs. These logs provide valuable insights into what’s going wrong behind the scenes. Look for options like “Debug Log,” “Error Log,” or “View Logs.”
- Troubleshooting Common Errors: Armed with debug information, you can often identify issues related to:
- Plugin Conflicts: When two plugins don’t play nicely together.
- Theme Issues: Problems arising from your theme’s code.
- PHP Errors: Syntax errors or problems with PHP code.
- Database Connection Problems: Issues connecting to your WordPress database.
By understanding and utilizing these advanced features, you’ll transform your WordPress management from reactive problem-solving to proactive, strategic development and maintenance.
If you’re looking to enhance your WordPress experience, the WordPress Toolkit Guide for Beginners is an excellent resource to get you started. Additionally, you might find it beneficial to explore how reliable web hosting services can play a crucial role in maximizing your online presence. For more insights on this topic, check out this informative article on maximizing your online presence.
Optimizing Performance and Troubleshooting Common Issues
| Section | Metrics |
|---|---|
| Introduction | Number of Views |
| Installation | Number of Downloads |
| Basic Features | Number of Active Users |
| Security | Number of Security Checks |
| Performance | Page Load Time |
Beyond just managing your sites, WordPress Toolkit can help you make them faster and more reliable. Let’s look at how to optimize performance and tackle those pesky common issues.
Improving Website Speed and Efficiency
A fast website is crucial for user experience and SEO. WordPress Toolkit often includes or integrates with tools to boost your site’s performance.
- Caching Integration: Caching is one of the most effective ways to speed up WordPress. WordPress Toolkit might offer options to integrate with popular caching plugins (like WP Super Cache or W3 Total Cache) or provide server-level caching solutions. Enabling caching means your website serves pre-generated pages instead of building them from scratch for every visitor, drastically reducing load times.
- Database Optimization: Over time, your WordPress database can accumulate junk data, making it larger and slower. Some Toolkit versions offer a one-click database optimization feature. This typically cleans up revisions, spam comments, transient options, and other unnecessary data, making your database more efficient.
- Image Optimization Recommendations: While not always directly built into the core Toolkit, it might provide recommendations or links to plugins for image optimization. Large, unoptimized images are a frequent culprit for slow websites. You should always compress your images before uploading them to WordPress.
- Gzip Compression: This server-side compression technique significantly reduces the size of your website files when they are transferred to a user’s browser. WordPress Toolkit or your hosting panel usually offers an option to enable Gzip compression, which is highly recommended.
Regularly checking your website’s performance (using tools like Google PageSpeed Insights or GTmetrix) and leveraging these optimization features will keep your site snappy and responsive.
Troubleshooting and Resolving Common WordPress Problems
Even with the best tools, you might encounter issues. WordPress Toolkit helps you diagnose and often fix these common problems.
- White Screen of Death (WSOD): This is perhaps the most frustrating WordPress error – a blank white page instead of your website. Toolkit’s debugging features (enabling WP_DEBUG) can often reveal the PHP error causing the WSOD, typically pointing to a problematic plugin or theme. If you can’t access the dashboard, you might be able to disable plugins/themes directly through the Toolkit interface.
- Admin Panel Not Loading: If you can’t log in to your wp-admin area, check for recent plugin or theme updates, or conflicts. Again, using the Toolkit to disable recently activated plugins or the active theme can often resolve the issue. Re-enabling them one by one helps you identify the culprit.
- Database Connection Errors: If your site displays an “Error establishing a database connection” message, it usually means WordPress can’t communicate with its database. This could be due to incorrect database credentials (rare if Toolkit set it up), a corrupted database, or server issues. Toolkit’s database management features might offer repair options.
- Internal Server Error (Error 500): This generic error indicates something went wrong on the server. It could be a corrupted
.htaccessfile, PHP memory limit issues, or a faulty plugin/theme. Toolkit might allow you to revert your.htaccessfile or increase PHP limits. - Updates Causing Issues: As mentioned, sometimes updates break things. The most effective troubleshoot for this is restoring a backup created before the update. This highlights the critical importance of regular backups.
When troubleshooting, always work systematically:
- Check for recent changes: Did you install a new plugin, update a theme, or modify any code?
- Enable debugging: Use WordPress Toolkit to turn on
WP_DEBUGand examine the error logs. - Deactivate plugins: Deactivate all plugins, then reactivate them one by one to find the conflicting one.
- Switch themes: Temporarily switch to a default WordPress theme (like Twenty Twenty-Four) to see if your active theme is causing the problem.
- Restore from backup: If all else fails, a recent backup is your ultimate recourse.
WordPress Toolkit significantly simplifies many of these troubleshooting steps by giving you direct control over your installations without manual file editing or database access.
If you’re looking to enhance your WordPress experience, the WordPress Toolkit Guide for Beginners is an excellent resource to get started. It provides essential tips and tools for managing your WordPress sites effectively. Additionally, if you’re considering improving your website’s performance, you might find it beneficial to explore how to upgrade to faster NVMe storage for your hosting plans, as this can significantly boost your site’s speed and reliability.
Conclusion: Empowering Your WordPress Journey
You’ve now taken significant strides in understanding and utilizing WordPress Toolkit. From effortless installations to robust security, efficient updates, reliable backups, and advanced development features like cloning and staging, you’re now equipped with the knowledge to manage your WordPress sites with unparalleled ease and confidence.
Remember, the goal of WordPress Toolkit is to simplify the often complex world of web management, freeing you up to focus on what truly matters: creating compelling content, engaging your audience, and growing your online presence.
Keep exploring the Toolkit’s features, practice regularly, and don’t be afraid to experiment with the staging environment. The more you familiarize yourself with this powerful tool, the more efficient and effective you’ll become in your WordPress journey. Your website, and your peace of mind, will thank you for it. Happy WordPressing!
FAQs
What is WordPress Toolkit?
WordPress Toolkit is a feature-rich management tool that helps users to install, configure, and manage WordPress websites on their hosting account. It provides a user-friendly interface to simplify the process of managing multiple WordPress sites.
What are the key features of WordPress Toolkit?
WordPress Toolkit offers features such as automated WordPress installation, one-click staging environment, security and maintenance tools, website cloning, and automatic updates for plugins and themes. It also provides a centralized dashboard for managing multiple WordPress sites.
How can beginners benefit from using WordPress Toolkit?
Beginners can benefit from using WordPress Toolkit as it simplifies the process of managing WordPress websites. It provides easy-to-use tools for tasks such as installation, updates, backups, and security, making it easier for beginners to manage their websites without needing advanced technical knowledge.
Is WordPress Toolkit compatible with all hosting providers?
WordPress Toolkit is compatible with select hosting providers that offer Plesk control panel. Users should check with their hosting provider to ensure compatibility before using WordPress Toolkit.
Are there any costs associated with using WordPress Toolkit?
The availability and cost of WordPress Toolkit may vary depending on the hosting provider. Some hosting providers may offer WordPress Toolkit as part of their hosting packages, while others may offer it as an add-on service for an additional fee.








Add comment