
You are embarking on a journey common to many entrepreneurs: establishing your digital presence. In today’s competitive landscape, a functional and professional website is not merely an advantage; it is a fundamental requirement. This guide will walk you through the essential steps to build such a website within a single day. This is an ambitious timeline, but with focus and a clear understanding of your needs, it is entirely achievable. You will need to make strategic decisions and prioritize functionality over extensive customization. This is about building a launchpad, not a fully realized, multi-faceted platform.
Before you even consider what platform you’ll use, you must clearly define the purpose of your website. This clarity will be your compass throughout the day. Without it, you risk scope creep and an unfinished project.
What is the Primary Goal of Your Website?
Are you selling a product directly? Generating leads for a service? Providing information? Each objective dictates different content and calls to action. A clear objective will inform every design and content decision you make. For instance, if your goal is lead generation, your landing pages will heavily feature forms and clear contact information. If you’re an e-commerce business, your product pages will be paramount.
Who is Your Target Audience?
Understanding your audience will influence the tone, language, and even visual style of your site. Are you addressing tech-savvy professionals or a more general consumer base? Tailoring your content to their needs and preferences is crucial for effective communication. Avoid jargon where plain language will suffice, and consider the demographics and psychographics of your ideal customer.
What Essential Information Must Be Present?
Strip away anything non-essential for your initial launch. Focus on the absolute necessities. This typically includes:
- Homepage: A brief introduction to your business and its value proposition.
- About Us/Company: Your story, mission, and perhaps key team members. Build trust and provide context.
- Services/Products: A clear, concise overview of what you offer.
- Contact Us: How potential customers can reach you (form, email, phone).
- Call to Action (CTA): What do you want visitors to do next? (e.g., “Request a Quote,” “Browse Products,” “Contact Us”). Ensure this is prominently displayed and easy to understand.
Anything beyond these core pages can be added in subsequent iterations. The goal is to launch, not to perfect.
For startups looking to establish a professional online presence quickly, creating a website in just one day can be a game-changer. However, to ensure that your website not only looks good but also performs well, it’s essential to consider the underlying technology. A related article that delves into optimizing website performance is available at Boost Your Business with Faster NVMe Storage. This resource highlights the importance of fast storage solutions for enhancing website speed, which can significantly impact user experience and conversion rates.
Choosing Your Platform and Tools
Your choice of platform will significantly impact the speed and ease of your website development. For a one-day build, you need something user-friendly and efficient.
Website Builders vs. Content Management Systems (CMS)
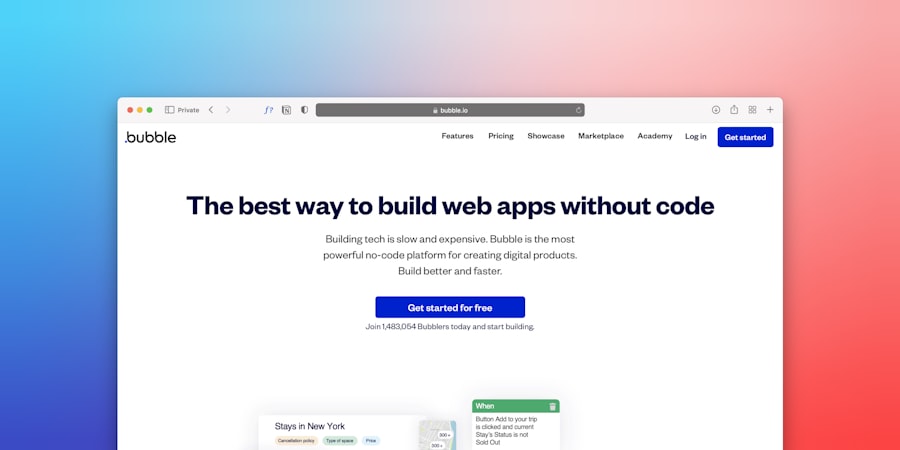
- Website Builders (e.g., Squarespace, Wix, Shopify for e-commerce): These are ideal for rapid deployment. They offer drag-and-drop interfaces, pre-designed templates, and integrated hosting. You sacrifice some flexibility and control for speed and simplicity. This is often the most pragmatic choice for a one-day build.
- Content Management Systems (e.g., WordPress.org with a page builder like Elementor/Beaver Builder): While more powerful and customizable, traditional CMS platforms require more technical understanding and setup time. If you have some familiarity with WordPress, or are willing to invest a few hours learning the basics of a page builder, this can be a viable option. However, for a true one-day goal, the learning curve can be a significant impediment.
Your decision here will hinge on your comfort level with technology and your budget. Website builders typically have a monthly subscription fee that includes hosting, while WordPress requires you to secure hosting separately.
Domain Name and Hosting (If Applicable)
If you’re using a website builder, hosting is usually included. If you opt for WordPress, you’ll need to purchase a domain name and hosting separately.
- Domain Name: Choose a name that is relevant, easy to remember, and spells correctly. Use a reputable registrar (e.g., Namecheap, GoDaddy).
- Hosting: Select a reliable hosting provider with good uptime and customer support. For a new website, a shared hosting plan is usually sufficient. Avoid providers that promise unrealistic pricing as they often compromise on quality.
Purchase these as early as possible in your day, as domain propagation can take a few hours.
Essential Tools for Content Creation
- Text Editor: For drafting your website copy (e.g., Google Docs, Microsoft Word).
- Image Editor: For basic image resizing, cropping, and optimization (e.g., Canva, GIMP, Adobe Photoshop Express). High-quality, optimized images are crucial for professionalism and loading speed.
- Stock Photo/Icon Libraries: For visuals if you lack your own (e.g., Unsplash, Pexels, Freepik). Always check licensing agreements.
Have these tools readily accessible and understand their basic functions before you begin the design phase.
Designing Your Website Structure and Aesthetics

Even with a one-day timeline, thoughtful design is non-negotiable. A well-structured and visually appealing website instills trust and encourages engagement.
Selecting a Template
This is where website builders excel. They offer hundreds of pre-designed templates tailored to various industries.
- Prioritize Functionality: Look for templates that closely match your desired layout and feature set. Don’t select a template based solely on aesthetics if it lacks the structural components you need.
- Responsiveness: Ensure the template is fully responsive, meaning it adapts seamlessly to different screen sizes (desktops, tablets, mobile phones). Test this early in your process.
- Simplicity: A clean, uncluttered template is usually more effective than an overly complex one. Your focus should be on clear communication, not visual extravagance.
Choose a template and commit to it. Avoid spending hours scrolling through options. The goal is to move forward.
Crafting a User-Friendly Navigation
Your website’s navigation is its roadmap. It must be intuitive and clear.
- Logical Hierarchy: Group related pages together. Use descriptive menu labels (e.g., “Services” instead of “What We Do”).
- Concise Menus: Avoid overly long menus. If you have many pages, consider using sub-menus where appropriate, but introduce them sparingly for a simpler experience.
- Consistent Placement: Place your navigation menu in a consistent location, typically at the top of the page (header) or on the left sidebar.
Think about the user’s journey. How would they naturally expect to find the information they’re looking for?
Visual Branding: Colors, Fonts, and Imagery
While you won’t have time for a full branding exercise, you can establish a consistent visual identity.
- Color Palette: Choose 2-3 primary colors that reflect your brand’s personality. Use a color wheel tool to find complementary colors. Apply these consistently to headings, buttons, and accents. Avoid clashing colors or too many different hues.
- Font Selection: Select 1-2 legible fonts – one for headings and one for body text. Ensure they are easy to read on all devices. Google Fonts offers a wide selection of free, high-quality fonts.
- Image Quality and Relevance: Use high-resolution, professional-looking images. Ensure they are relevant to your content and convey the right message. Optimize images for the web to improve loading speed.
Consistency in these elements builds a professional and cohesive appearance. Even small details contribute to the overall impression.
Populating Your Website with Content
This is where your pre-prepared content becomes invaluable. You will be pasting and formatting, not writing from scratch.
Writing Effective and Concise Copy
- Clarity and Conciseness: Every word counts. Avoid verbose language or jargon. Get straight to the point. Your visitors have limited attention spans.
- Benefit-Oriented Language: Focus on how your product or service benefits the customer, rather than just listing features. What problem do you solve for them?
- Strong Calls to Action: Guide your visitors. Tell them what you want them to do next. Use active verbs and make your CTAs prominent.
- Proofread Meticulously: Typos and grammatical errors erode credibility. Use online tools like Grammarly, but also read your content aloud to catch awkward phrasing. Better yet, have a fresh pair of eyes review it if time permits.
Optimizing Images and Other Media
Large image files are a primary cause of slow website loading times. This impacts user experience and search engine rankings.
- Compression: Use online image compressors (e.g., TinyPNG, ShortPixel) to reduce file size without significant loss of quality. Most website builders also have built-in optimization tools.
- Appropriate File Formats: Use JPEG for photographs, PNG for images with transparency, and SVG for logos and icons (if supported by your platform).
- Descriptive Alt Text: Add “alt text” to all your images. This describes the image for visually impaired users and provides context for search engines. It’s a small but important SEO consideration.
Do not skip this step. A fast-loading website is paramount for user satisfaction and search engine discoverability.
Incorporating Contact Forms and Other Essential Elements
- Contact Forms: Most website builders and CMS platforms offer easy integration of contact forms. Keep them simple, asking only for necessary information.
- Social Media Links: Connect your website to your active social media profiles. Place these prominently but not intrusively.
- Privacy Policy/Terms & Conditions (Footer): Even for a basic site, these are important for legal compliance. Use a template or generator if you don’t have them prepared. They typically reside in the website footer.
- Google Analytics (or equivalent): Set up basic tracking to understand your website’s performance from day one. You won’t be analyzing complex reports on day one, but collecting data from the start is crucial for future optimization.
Ensure all external links and forms are functioning correctly before launch.
For startups looking to establish a strong online presence quickly, creating a professional website in just one day can be a game-changer. However, it’s also essential to consider the long-term value of your online assets. A related article discusses the resale value of PK domains and offers insights into investment trends and predictions for 2025. This information can be invaluable for entrepreneurs aiming to make informed decisions about their digital real estate. You can read more about it in this article.
Testing, Launching, and Initial Maintenance
| Steps | Details |
|---|---|
| 1. Choose a Website Builder | Consider using platforms like Wix, Squarespace, or WordPress for easy and quick website building. |
| 2. Select a Template | Choose a professional template that aligns with your brand and business needs. |
| 3. Customize Content | Edit the template to include your own text, images, and branding elements. |
| 4. Add Functionality | Integrate features like contact forms, social media links, and e-commerce capabilities. |
| 5. Optimize for SEO | Ensure your website is optimized for search engines by using relevant keywords and meta tags. |
| 6. Test and Launch | Review your website for any errors or issues before publishing it live. |
You are nearing the finish line. Don’t rush this final phase; it can undo all your hard work if overlooked.
Thoroughly Test Your Website
Consider this your final quality assurance check. Address every potential flaw before going live.
- Functionality: Test all forms, buttons, links, and interactive elements. Do they work as expected?
- Responsiveness: View your website on different devices (desktop, tablet, various mobile phones) and browsers (Chrome, Firefox, Safari, Edge). Ensure the layout remains consistent and legible. Most website builders have built-in responsive preview tools.
- Content Accuracy: Re-read all your text for typos, grammatical errors, and factual inaccuracies. Have someone else review it if possible.
- Loading Speed: Use tools like Google PageSpeed Insights or GTmetrix to check your website’s loading performance. Address any critical issues identified.
A well-tested website projects professionalism and competence.
Launching Your Website
The actual launch process will vary depending on your chosen platform.
- Website Builders: Often, it’s as simple as clicking a “Publish” button. Some may require connecting your custom domain name first.
- WordPress: Once your site is built and tested, you’ll need to update your domain’s DNS records to point to your hosting provider. This can take a few hours to propagate globally. Make sure to set your WordPress site from “Under Construction” to “Live.”
Monitor your site immediately after launch to ensure everything is operating as intended. Be prepared to address minor issues promptly.
Post-Launch Monitoring and Basic Maintenance
Your website is a living entity, even a simple one. It requires ongoing attention.
- Regular Backups: Implement a backup strategy from day one. Most hosting providers or website builders offer this as a feature. This protects you against data loss.
- Security Updates (for CMS like WordPress): If you’re using WordPress, regularly update your WordPress core, themes, and plugins to patch security vulnerabilities and ensure compatibility.
- Content Updates: While you built a minimal site, commit to regularly reviewing and updating your content. Stale content reflects poorly on your business.
- Performance Monitoring: Keep an eye on your website’s performance using Google Analytics. Look for sudden drops in traffic or spikes in bounce rates, which could indicate underlying issues.
Building a professional website in one day is about focused execution and strategic minimalism. You’ve established a vital digital presence, enabling your startup to begin interacting with its audience. This initial version is a foundation; you can iterate and expand upon it as your business grows and your understanding of your audience deepens. The critical step is to get started, and you have just done that.
FAQs
1. Why is it important for startups to have a professional website?
It is important for startups to have a professional website because it serves as the online face of the business, helping to establish credibility, attract customers, and showcase products or services.
2. What are some key elements that startups should include on their website?
Startups should include key elements such as a clear and concise value proposition, easy navigation, contact information, high-quality images, and a call-to-action to encourage user engagement.
3. What are some website building platforms that startups can use to create a professional website in one day?
Startups can use website building platforms such as Wix, Squarespace, WordPress, or Shopify to create a professional website in one day, as these platforms offer user-friendly templates and drag-and-drop features.
4. How can startups ensure that their website is mobile-friendly?
Startups can ensure that their website is mobile-friendly by using responsive design, optimizing images and videos for mobile viewing, and testing the website on various mobile devices to ensure a seamless user experience.
5. What are some tips for startups to drive traffic to their website after it is launched?
Startups can drive traffic to their website by utilizing search engine optimization (SEO) techniques, creating valuable content, engaging with their target audience on social media, and leveraging email marketing to promote their website and attract visitors.


Add comment