

Understanding the WordPress-Server Connection
You’ve built your dream website on WordPress, brimming with fantastic content and elegant design. Yet, you’re constantly battling sluggish load times, inexplicable errors, and a general feeling of instability. It’s frustrating, isn’t it? What many WordPress users don’t fully grasp is that while WordPress itself is a powerful content management system, its performance and stability are intrinsically linked to the server it resides on. Think of WordPress as the engine of a high-performance car; no matter how well-engineered the engine, it won’t perform optimally if the fuel system (your server) is clogged, the tires (server resources) are flat, or the chassis (server configuration) is misaligned. Understanding this fundamental connection is the first step towards resolving a myriad of WordPress errors.
Your server isn’t just a digital storage locker for your website files; it’s an active participant in every single user interaction. When someone visits your site, their browser sends a request to your server. The server then processes this request, retrieves the necessary WordPress files and database information, executes PHP scripts, and sends the rendered HTML back to the user. Each step in this intricate dance requires server resources, processing power, and efficient configuration. If any part of this chain is weak, you’ll experience errors ranging from “Error Establishing a Database Connection” to “Internal Server Error 500,” or simply painfully slow page loads that drive visitors away. By taking control of your server configuration, you’re not just patching up symptoms; you’re addressing the root causes of many common WordPress woes, paving the way for a faster, more reliable, and ultimately more successful website.
Identifying Common WordPress Errors Related to Server Issues
Before diving into solutions, it’s crucial to recognize the symptoms. Many seemingly WordPress-specific errors actually stem from inadequate or improperly configured server environments. You might be blaming a plugin, theme, or even WordPress core itself, when in reality, your server is the bottleneck.
“Error Establishing a Database Connection”
This is perhaps one of the most dreaded WordPress errors. When you see this, it means your WordPress installation cannot communicate with its database. While incorrect database credentials in wp-config.php are a common cause, server-side issues are also frequent culprits. Your database server might be overloaded, out of memory, or simply not responding. The MySQL server might have crashed, or the user credentials your WordPress site is using might lack the necessary permissions to connect. This often points to insufficient server resources or a poorly configured database server that can’t handle the load.
“Internal Server Error 500”
The infamous 500 error is a generic message indicating that something went wrong on the server, but the server couldn’t be more specific. For WordPress users, this often relates to corrupted .htaccess files, exhausted PHP memory limits, issues with PHP versions, or incorrect file permissions. While a faulty plugin or theme can trigger this, the underlying cause often involves how your server handles PHP execution and resource allocation. If your PHP memory limit is too low, or if the server’s execution time for PHP scripts is too restrictive, complex operations can time out, leading to this error.
“White Screen of Death” (WSOD)
Similar to the 500 error, the WSOD presents a blank white page with no error message, leaving you completely in the dark. This usually indicates a fatal PHP error where the server encounters a problem it cannot recover from. It’s often linked to PHP memory limits being exceeded, incompatible plugins or themes, or a server that isn’t displaying PHP errors, making diagnosis incredibly difficult. A common scenario is when a plugin requires more memory than your server is configured to provide, causing the PHP process to crash.
Slow Page Load Times and Timeouts
While not always an explicit error message, slow page load times are a critical performance error that significantly impacts user experience and SEO. This can be attributed to a multitude of server-side factors: insufficient CPU, RAM, slow disk I/O, an unoptimized web server (Apache/Nginx) configuration, a lack of caching mechanisms, or even poor network connectivity from your hosting provider. When pages take too long to load, users often abandon your site, leading to higher bounce rates and missed opportunities. Timeouts occur when the server takes too long to respond to a request, often due to overloaded resources or overly restrictive server timeout settings.
To further enhance your WordPress site’s performance and security, it’s essential to consider not only server configuration but also overall website security measures. A related article that provides valuable insights on this topic is titled “How to Improve Your Website Security: 6 Powerful Tips.” You can read it by following this link: How to Improve Your Website Security: 6 Powerful Tips. This resource offers practical advice that complements the strategies for reducing WordPress errors through better server configuration.
Optimizing PHP Configuration for WordPress
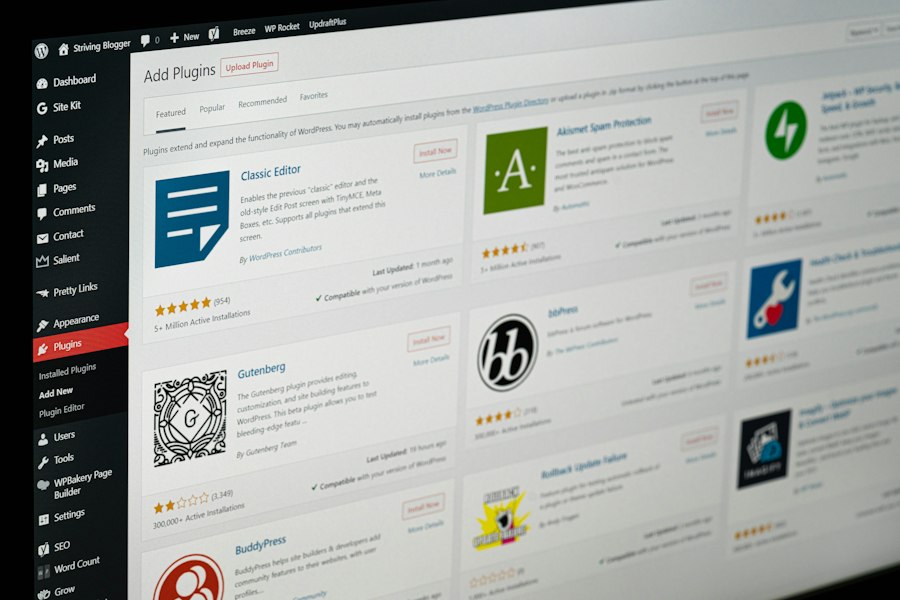
PHP is the backbone of WordPress. Almost everything WordPress does, from generating pages to processing forms, relies on PHP scripts executing efficiently on your server. Therefore, a properly configured PHP environment is paramount for a fast and stable WordPress site. Many common errors and performance bottlenecks can be traced back to default or insufficient PHP settings. You need to ensure your server’s PHP configuration provides enough resources for WordPress to run smoothly, while also maintaining security and efficiency.
Increasing PHP Memory Limit
One of the most frequent causes of the White Screen of Death or the Internal Server Error 500 in WordPress is an exhausted PHP memory limit. By default, many hosting providers set this limit quite low (e.g., 64MB or 128MB), which can be insufficient for WordPress, especially with multiple plugins, complex themes, or large media libraries. When a PHP script tries to allocate more memory than the limit allows, it crashes, often resulting in a blank page or a 500 error.
You can typically increase your PHP memory limit by modifying one of the following files, in order of preference:
wp-config.php: Add the following line above the/ That's all, stop editing! Happy blogging. /line:
define('WP_MEMORY_LIMIT', '256M');
For more demanding sites, you might even consider 512M. This setting directly tells WordPress to request this amount of memory.
php.ini: If you have access to yourphp.inifile (often found in the root of your public_html directory or aphp.ddirectory), find the linememory_limitand change its value:
memory_limit = 256M;
Remember to restart your web server or PHP-FPM for changes to take effect if you’re on a VPS or dedicated server. Shared hosting users might need to ask their provider.
.htaccess: While not always recommended as it can sometimes be overridden by server settings, you can try adding this line to your.htaccessfile:
php_value memory_limit 256M
If you’re unsure which method works best or if you’re on shared hosting, consult your host’s documentation or support.
Adjusting PHP Execution Time and Input Variables
WordPress can perform complex operations, especially when importing content, running updates, or processing large forms. If these operations take too long, your PHP script might time out, resulting in errors or incomplete actions. Similarly, complex forms or certain plugins might require a larger number of input variables.
max_execution_time: This setting defines the maximum time in seconds a script is allowed to run. If your site frequently times out during updates or plugin installations, increasing this value can help. You can typically set it inphp.inior.htaccess:
max_execution_time = 300; (in php.ini)
php_value max_execution_time 300 (in .htaccess)
A value of 120-300 seconds is usually sufficient for most WordPress sites.
max_input_time: This specifies how much time a script is allowed to parse input data, like large POST requests. For forms with many fields or data submissions, increasing this can prevent timeouts.
max_input_time = 60; (in php.ini)
php_value max_input_time 60 (in .htaccess)
max_input_vars: Some themes and plugins, particularly those with extensive customization options (e.g., page builders, theme options panels), require a higher number of input variables. If you experience issues saving changes in theme options or seeing “parts” of your settings missing, this might be the culprit.
max_input_vars = 3000; (in php.ini)
php_value max_input_vars 3000 (in .htaccess)
The default is often 1000, which can be too low for modern WordPress setups.
Choosing the Right PHP Version
Running an outdated PHP version is a common mistake that severely impacts both performance and security. Each new major PHP release brings significant performance improvements and crucial security patches. WordPress officially recommends PHP 7.4 or greater, with PHP 8.x offering substantial speed boosts.
- Performance Benefits: Benchmarks consistently show that newer PHP versions (especially 7.4 and 8.x) process requests significantly faster, leading to quicker page loads and a more responsive backend. This means your server can handle more concurrent users with the same resources.
- Security: Older PHP versions are no longer supported with security updates, making your site vulnerable to known exploits. Upgrading closes these security holes.
- Compatibility: While WordPress strives for backward compatibility, many modern plugins and themes are optimized for, or even require, newer PHP versions. Running an old PHP version can lead to compatibility errors, broken functionalities, and the dreaded White Screen of Death.
Most hosting providers offer a way to change your PHP version through their control panel (cPanel, Plesk, custom dashboard). Always back up your site before changing PHP versions and test thoroughly afterward. If you encounter issues, temporarily revert to the previous version and investigate plugin/theme compatibility.
Enabling PHP Error Logging
When things go wrong, you need to know why. Enabling PHP error logging is like installing a black box recorder for your website. It captures critical information about errors, warnings, and notices, providing invaluable clues for debugging.
You can enable logging in your php.ini file:
log_errors = On;
error_log = /path/to/your/custom_php_error.log;
Replace /path/to/your/custom_php_error.log with an actual path outside your web-accessible directory for security reasons. This ensures that sensitive error information isn’t exposed to the public. If you don’t specify a path, errors might be logged to your web server’s default error log (e.g., Apache’s error_log or Nginx’s error.log), which requires server access to view.
For temporary debugging directly in WordPress, you can also add these lines to your wp-config.php file:
define( 'WP_DEBUG', true );
define( 'WP_DEBUG_LOG', true );
define( 'WP_DEBUG_DISPLAY', false );
WP_DEBUG enables debugging mode. WP_DEBUG_LOG tells WordPress to save all errors to a debug.log file inside the wp-content directory. WP_DEBUG_DISPLAY set to false prevents errors from being shown on the front-end of your site, which is crucial for production environments. Always remember to set WP_DEBUG to false when you’re done debugging on a live site to prevent performance overhead and potential security disclosures.
Configuring Your Web Server (Apache/Nginx)
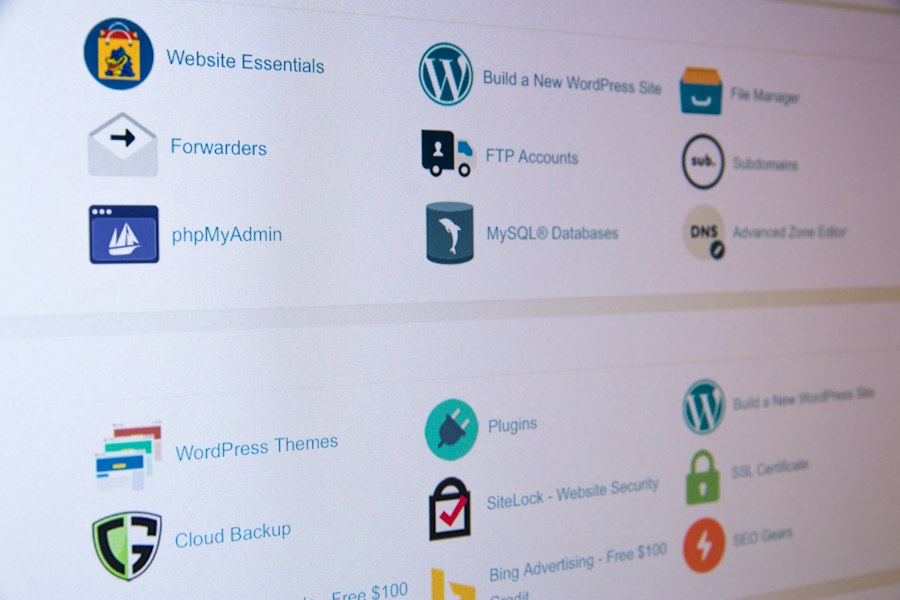
Your web server, whether it’s Apache or Nginx, is the first point of contact for every visitor to your WordPress site. Its configuration plays a pivotal role in how efficiently requests are processed, how static content is served, and ultimately, how fast your website loads. Optimizing these settings can dramatically reduce server load and improve overall performance and stability.
Optimizing Apache with .htaccess
Apache is a widely used web server, and for WordPress, its configuration often involves the .htaccess file located in your root directory. While Apache configuration via .htaccess provides flexibility, it’s also resource-intensive as the server has to parse this file on every request. Thus, judicious use and optimization are key.
- Enabling Gzip Compression: Gzip compresses your website’s files (HTML, CSS, JavaScript) before sending them to the user’s browser, significantly reducing transfer size and improving load times. You can enable it in
.htaccess:
“`apache
AddOutputFilterByType DEFLATE text/plain
AddOutputFilterByType DEFLATE text/html
AddOutputFilterByType DEFLATE text/xml
AddOutputFilterByType DEFLATE text/css
AddOutputFilterByType DEFLATE application/xml
AddOutputFilterByType DEFLATE application/xhtml+xml
AddOutputFilterByType DEFLATE application/rss+xml
AddOutputFilterByType DEFLATE application/javascript
AddOutputFilterByType DEFLATE application/x-javascript
“`
Ensure mod_deflate is enabled on your server.
- Leveraging Browser Caching: Browser caching tells visitors’ browsers to store certain files (images, CSS, JS) locally for a specified period. This means subsequent visits don’t require re-downloading these files, leading to much faster page loads.
“`apache
ExpiresActive On
ExpiresByType image/jpg “access 1 year”
ExpiresByType image/jpeg “access 1 year”
ExpiresByType image/gif “access 1 year”
ExpiresByType image/png “access 1 year”
ExpiresByType image/webp “access 1 year”
ExpiresByType text/css “access 1 month”
ExpiresByType application/javascript “access 1 month”
ExpiresByType application/x-javascript “access 1 month”
ExpiresByType image/x-icon “access 1 year”
ExpiresDefault “access 2 days”
“`
Again, ensure mod_expires is enabled.
- Securing
wp-config.php: Yourwp-config.phpfile contains sensitive database credentials. You can prevent direct access to it via.htaccess:
“`apache
order allow,deny
deny from all
“`
- Preventing Directory Browsing: By default, if there’s no
index.phporindex.htmlfile in a directory, Apache might list its contents, exposing sensitive file structures. Prevent this:
Options -Indexes
While .htaccess is powerful, remember that every directive adds overhead. For critical performance gains, consider moving these directives to your main Apache configuration files (e.g., httpd.conf or virtual host files) if you have server access, as this is parsed once on server start-up, not on every request.
Nginx Configuration for WordPress
Nginx is known for its high performance, especially for serving static content and acting as a reverse proxy. Its event-driven architecture makes it very efficient for handling many concurrent connections. While Nginx doesn’t use .htaccess files, you configure it directly through its configuration files, which is generally more performant.
- Basic WordPress Configuration: A typical Nginx configuration for WordPress involves directing dynamic requests (PHP) to a PHP-FPM (FastCGI Process Manager) backend and serving static files directly.
“`nginx
server {
listen 80;
server_name yourdomain.com www.yourdomain.com;
root /var/www/yourdomain.com/public_html; # Your WordPress root directory
index index.php index.html index.htm;
location / {
try_files $uri $uri/ /index.php?$args;
}
location ~ \.php$ {
include snippets/fastcgi-php.conf;
fastcgi_pass unix:/run/php/php8.1-fpm.sock; # Adjust PHP-FPM socket
fastcgi_param SCRIPT_FILENAME $document_root$fastcgi_script_name;
include fastcgi_params;
}
Deny access to .htaccess files, if Apache’s .htaccess files are accidentally uploaded
location ~ /\.ht {
deny all;
}
Cache static files longer
location ~* \.(jpg|jpeg|gif|png|webp|css|js|ico|woff|woff2|ttf|eot|svg)$ {
expires 365d;
add_header Cache-Control “public, no-transform”;
}
}
“`
This configuration ensures that requests for non-existent files or directories are routed to index.php (WordPress’s front controller) and PHP files are processed by PHP-FPM. It also includes basic caching for static files.
- Gzip Compression: Nginx has its own powerful gzip module.
“`nginx
gzip on;
gzip_vary on;
gzip_proxied any;
gzip_comp_level 6;
gzip_buffers 16 8k;
gzip_http_version 1.1;
gzip_types text/plain text/css application/json application/javascript text/xml application/xml application/xml+rss text/javascript;
“`
This should be placed within the http block of your nginx.conf file or your server block.
- FastCGI Cache (for advanced users): Nginx can act as a reverse proxy and cache dynamic content generated by PHP-FPM. This is a very effective way to speed up WordPress by serving cached pages directly from Nginx without involving PHP for every request. This is more complex to set up and requires careful invalidation strategies.
“`nginx
Define cache zone outside server block
fastcgi_cache_path /var/run/nginx-cache levels=1:2 keys_zone=WORDPRESS:100m inactive=60m;
fastcgi_cache_key “$scheme$request_method$host$request_uri”;
Inside your server block
location / {
try_files $uri $uri/ /index.php?$args;
fastcgi_cache WORDPRESS;
fastcgi_cache_valid 200 60m; # Cache 200 responses for 60 minutes
fastcgi_cache_valid 404 1m;
fastcgi_cache_use_stale error timeout invalid_header updating http_500;
fastcgi_ignore_headers Cache-Control Expires Set-Cookie;
add_header X-FastCGI-Cache $upstream_cache_status;
}
“`
This is a simplified example and a full FastCGI cache setup for WordPress requires more detailed handling of cookies, logged-in users, and specific URLs to avoid caching.
Securing Web Server Access and Permissions
Proper file and directory permissions are fundamental for both security and functionality in WordPress. Incorrect permissions can lead to “Internal Server Error 500,” inability to upload media, or even allow malicious scripts to be executed.
- File Permissions:
- Directories: Should generally be set to
755. This allows the owner to read, write, and execute; the group and others can read and execute (traverse). - Files: Should generally be set to
644. This allows the owner to read and write; the group and others can only read. wp-config.php: This crucial file contains sensitive database credentials. For enhanced security, it’s often recommended to set its permissions to640or even600(read/write only by the owner). Be cautious with600as it might cause issues on some shared hosting environments if the web server process isn’t the file owner.
- Ownership: The user and group that own your WordPress files should ideally be the same user and group that your web server process runs as. For example, on many Linux systems, Apache runs as
www-data:www-dataorapache:apache, and Nginx with PHP-FPM might run asnginx:nginxorwww-data:www-data. Correct ownership ensures the web server can read and write files when necessary (e.g., for media uploads, plugin/theme updates) without having overly permissive permissions.
You can change permissions and ownership using SSH commands:
sudo find /path/to/wordpress/ -type d -exec chmod 755 {} \; (for directories)
sudo find /path/to/wordpress/ -type f -exec chmod 644 {} \; (for files)
sudo chmod 640 /path/to/wordpress/wp-config.php (for wp-config.php)
sudo chown -R www-data:www-data /path/to/wordpress/ (change ownership, replace www-data:www-data with your web server user/group)
Never set global permissions to 777 for any file or directory on a production server. This grants write access to anyone, opening your site to severe security vulnerabilities.
Database Optimization and Configuration
The WordPress database (MySQL or MariaDB) is where all your post content, comments, user information, plugin settings, and much more are stored. A slow or poorly configured database is a major bottleneck for WordPress performance and a source of various errors. Just like PHP, your database server needs sufficient resources and intelligent configuration to perform optimally.
Increasing MySQL/MariaDB Memory Allocation
Your database server uses RAM to cache frequently accessed data and queries. If it doesn’t have enough memory, it will constantly hit the disk, which is significantly slower. Allocating sufficient memory to your database is one of the most impactful optimizations you can make.
The primary configuration file for MySQL/MariaDB is my.cnf (or my.ini on Windows), typically found in /etc/mysql/ or /etc/my.cnf.
innodb_buffer_pool_size: This is arguably the most critical setting for InnoDB (the default storage engine for WordPress). It defines the amount of RAM allocated to cache data and indexes. Ideally, this should be set to 50-80% of your available RAM if your server is primarily dedicated to the database. For a server with 4GB RAM, setting it to2Gor3Gwould be appropriate.
innodb_buffer_pool_size = 2G
If it’s too small, your database will constantly read from disk, slowing down every query.
key_buffer_size: This is for MyISAM tables (though less common in modern WordPress). If you still have MyISAM tables, allocate some memory here.
key_buffer_size = 128M
query_cache_sizeandquery_cache_type: In older MySQL versions, the query cache could improve performance for repetitive queries. However, in newer versions (MySQL 5.7.20 and later, and MariaDB 10.1.7 and later), the query cache is deprecated due to concurrency issues and can often degrade performance under high load. It’s generally recommended to disable it.
query_cache_type = 0
query_cache_size = 0
tmp_table_sizeandmax_heap_table_size: These settings control the maximum size for in-memory temporary tables. If a temporary table exceeds this size, MySQL writes it to disk, which is slower. Increase these if you have complex queries or plugins that perform large sorting operations.
tmp_table_size = 256M
max_heap_table_size = 256M
After making changes to my.cnf, you must restart your MySQL/MariaDB service for them to take effect.
Optimizing Database Queries and Indexes
While server configuration helps, inefficient database queries can still cripple your site. WordPress core, themes, and plugins all generate database queries.
- Database Cleanup: Over time, your WordPress database accumulates a lot of junk: post revisions, unapproved comments, trashed items, pingbacks, trackbacks, and transient options left by uninstalled plugins. This bloat slows down queries and increases database size.
- Use plugins like WP-Optimize, Advanced Database Cleaner, or WP-Sweep to periodically clean and optimize your database. These plugins can remove unnecessary data, optimize table structures, and fix overhead.
- You can also manually limit post revisions by adding
define('WP_POST_REVISIONS', 3);(orfalseto disable) to yourwp-config.phpfile.
- Indexing: Database indexes are crucial for speeding up data retrieval. When you query a table, MySQL can use an index to quickly locate relevant rows instead of scanning the entire table. WordPress and well-coded plugins usually create necessary indexes. However, if you’re running custom queries or using plugins that don’t optimize their tables, you might need to add indexes.
- Tools like phpMyAdmin can show you table structures and indexes. Using
EXPLAINon slow queries can reveal if indexes are being used effectively. - Generally, columns frequently used in
WHEREclauses,JOINconditions, orORDER BYclauses are good candidates for indexing. - Caution: Adding too many indexes can slow down write operations (INSERT, UPDATE, DELETE) and consume more disk space. Index judiciously.
Choosing Between MySQL and MariaDB
MariaDB is a community-developed fork of MySQL, created by the original developers of MySQL. It’s designed to be a drop-in replacement for MySQL, meaning you can switch between them without major compatibility issues with WordPress.
- Performance: MariaDB often boasts performance improvements over equivalent MySQL versions, particularly with its
InnoDBstorage engine optimizations and alternative storage engines likeAriaandTokuDB(thoughTokuDBis less common for WordPress). - Features: MariaDB frequently introduces new features and optimizations earlier than MySQL.
- Community Support: Both have strong community support.
- Recommendation: For new installations or migrations, MariaDB is generally a strong recommendation due to its performance benefits and active development. Many modern hosting providers now offer MariaDB as their default MySQL alternative. If you’re currently using MySQL, switching to MariaDB can offer a noticeable speed boost with minimal effort, provided your host supports it.
To enhance your WordPress experience and minimize errors through improved server configuration, it’s also beneficial to understand the broader context of website management. A related article discusses the importance of maintaining a blog for your e-commerce site, which can significantly impact your online presence and customer engagement. You can read more about this in the article on why your e-commerce website needs a blog here. By integrating these strategies, you can create a more robust and error-free WordPress environment.
Implementing Caching and Content Delivery Networks (CDNs)
| Metric | Recommended Server Configuration | Impact on WordPress Errors | Notes |
|---|---|---|---|
| PHP Memory Limit | Increase to at least 256MB | Reduces memory exhaustion errors | Modify php.ini or wp-config.php |
| Max Execution Time | Set to 300 seconds or higher | Prevents timeout errors during heavy processes | Adjust in php.ini or .htaccess |
| File Upload Size Limit | Set to 64MB or more | Prevents upload errors for large media files | Configure upload_max_filesize and post_max_size |
| Database Connection Timeout | Increase timeout to 30 seconds | Reduces database connection errors | Set in MySQL server config |
| PHP Error Reporting | Disable display_errors on production | Prevents error messages from showing to users | Set display_errors = Off in php.ini |
| Server Software | Use latest stable versions (e.g., Apache 2.4+, Nginx 1.18+) | Improves compatibility and security | Regular updates recommended |
| OPcache Enabled | Enable PHP OPcache | Improves performance and reduces script errors | Configure in php.ini |
| SSL Configuration | Use valid SSL certificates and enforce HTTPS | Prevents mixed content and security errors | Use Let’s Encrypt or other providers |
Even with the most perfectly configured server, there’s a limit to how fast your server can process requests. Caching mechanisms and CDNs are essential layers that offload work from your server, deliver content faster to users worldwide, and drastically improve perceived performance and stability. They reduce the number of requests that hit your backend PHP and database, preventing your server from being overwhelmed.
WordPress Caching Strategies
Caching stores copies of your website’s content in various places, allowing it to be served much faster on subsequent requests without reprocessing.
- Page Caching: This is the most effective form of caching. When a user visits a page, a complete HTML version of that page is generated and saved. Subsequent visitors then receive this pre-built HTML file directly, bypassing WordPress PHP execution and database queries almost entirely.
- Plugins: Popular plugins like WP Super Cache, W3 Total Cache, and LiteSpeed Cache (for LiteSpeed servers) implement robust page caching. They create static HTML files that your web server can serve directly.
- Server-Side Caching: Some hosts offer server-level page caching (e.g., Varnish, Nginx FastCGI Cache, LiteSpeed’s built-in cache) which is even more efficient as it operates before WordPress is even loaded. This is often the fastest form of page caching.
- Configuration: When configuring these plugins, ensure you enable page caching, configure cache preloading (to build the cache before visitors arrive), and set up cache invalidation rules (e.g., clear cache when a post is published or updated).
- Object Caching: WordPress uses an object cache to store results of database queries and other frequently accessed data in memory. This prevents redundant database calls.
- Persistent Object Cache: For high-traffic sites, a persistent object cache like Redis or Memcached is highly recommended. These systems store the object cache outside the PHP process, allowing it to persist across requests and be shared across multiple PHP processes.
- Plugins: W3 Total Cache and LiteSpeed Cache can integrate with Redis/Memcached. You’ll typically need to install the corresponding PHP extension on your server (
php-redisorphp-memcached) and then configure the caching plugin to use it. - Benefits: Reduces database load, especially for sites with many users or complex dynamic content.
- Browser Caching: As discussed in the web server section, browser caching instructs the user’s browser to store static assets (images, CSS, JS) locally. This is configured via web server directives (Apache’s
mod_expiresor Nginxexpiresdirective) and is critical for repeat visitors.
- Database Caching: While object caching helps, some plugins also offer specific database caching that stores results of database queries. This can be beneficial, but often page caching combined with persistent object caching provides more significant gains.
Implementing a Content Delivery Network (CDN)
A CDN is a geographically distributed network of servers that caches your website’s static assets (images, CSS, JavaScript, videos) and delivers them to users from the server closest to them.
- How it Works: When a user requests a resource (e.g., an image) from your site, the CDN intercepts the request. If it has a cached copy of that image on a server near the user, it serves it directly. If not, it fetches it from your origin server, caches it, and then delivers it to the user.
- Benefits:
- Faster Load Times: Reduces latency by serving content from edge locations closer to the user.
- Reduced Server Load: Offloads static asset delivery from your origin server, freeing up its resources to process dynamic requests.
- Improved Reliability and Scalability: Distributes traffic, making your site more resilient to traffic spikes and DDoS attacks.
- Enhanced SEO: Page speed is a ranking factor, and CDNs directly contribute to faster load times.
- Popular CDN Providers: Cloudflare (offers a free tier), KeyCDN, Sucuri, StackPath, Amazon CloudFront, Google Cloud CDN.
- Integration with WordPress:
- CDN Plugins: Plugins like W3 Total Cache and LiteSpeed Cache have direct integrations with popular CDNs, making setup relatively straightforward. You configure the plugin with your CDN provider’s details, and it automatically rewrites your asset URLs to point to the CDN.
- DNS Integration (Cloudflare): For services like Cloudflare, you change your domain’s nameservers to point to Cloudflare. Cloudflare then acts as a reverse proxy, filtering all traffic to your site and automatically caching static assets and providing security features. This is often the simplest and most powerful integration method.
When choosing a CDN, consider factors like pricing, global coverage, features (e.g., DDoS protection, image optimization), and ease of integration with WordPress. Always test your site after implementing a CDN to ensure all assets are loading correctly and performance has improved.
To effectively minimize WordPress errors through improved server configuration, it’s also beneficial to explore additional strategies for enhancing your website’s performance. One insightful resource is an article that discusses various optimization techniques, which can complement your server adjustments. You can read more about these strategies in this article on website optimization tips. By implementing both server configuration improvements and optimization practices, you can create a more robust and error-free WordPress experience.
Monitoring and Maintenance for Server Health
Setting up your server correctly is a crucial first step, but it’s not a set-and-forget task. Servers, like any complex machinery, require ongoing monitoring and maintenance to ensure optimal performance, prevent issues, and react promptly when problems arise. Proactive monitoring can help you spot potential errors before they impact your users, while regular maintenance keeps your server lean, secure, and efficient.
Server Resource Monitoring (CPU, RAM, Disk I/O)
Understanding how your server resources are being utilized is essential for diagnosing performance issues and planning for scalability. If your CPU is constantly at 100%, or your RAM is always maxed out, it’s a clear sign your server is struggling to keep up with demand.
- Tools for Monitoring:
- Hosting Control Panel: Many shared and managed VPS hosts provide resource usage graphs and statistics directly in their control panel (cPanel, Plesk, custom dashboards). These often show CPU usage, RAM usage, disk I/O, and sometimes network traffic.
- Command Line Tools (SSH):
toporhtop: Provides a real-time, dynamic view of running processes, CPU usage, memory usage, and swap space.htopis a more user-friendly version oftop.free -h: Shows total, used, and free amounts of physical and swap memory in a human-readable format.df -h: Displays disk space usage for file systems. Crucial for ensuring you don’t run out of disk space.iostat(fromsysstatpackage): Monitors CPU utilization and I/O statistics for devices and partitions. Helps identify if slow disk access is a bottleneck.netstatorss: Shows network connections, routing tables, and interface statistics. Useful for diagnosing network-related issues or high connection counts.- Third-Party Monitoring Services: Services like New Relic, Datadog, or custom Prometheus/Grafana stacks offer advanced monitoring, alerting, and performance insights for VPS/dedicated servers. They can track application-level metrics (e.g., slow database queries, PHP execution times) in addition to server resources.
- Interpreting Data:
- High CPU Usage: Could indicate inefficient PHP scripts, unoptimized database queries, too many concurrent users, or a need for a more powerful CPU.
- High RAM Usage: Might mean your PHP memory limits are too low, your database buffer pool is too small, or you have too many processes running. Watch for excessive swap usage, which indicates RAM is insufficient and the server is resorting to slower disk-based memory.
- High Disk I/O: Often points to a slow disk (HDD vs. SSD), inefficient database operations, or inadequate caching that forces frequent disk reads/writes.
Log File Analysis for Error Diagnosis
Server logs are invaluable diagnostic tools. They record every significant event, error, and warning that occurs on your server. Regularly reviewing these logs can help you identify recurring issues, security threats, and performance bottlenecks.
- Access Logs: Your web server (Apache/Nginx) access logs record every request made to your server, including the IP address of the requester, the URL, HTTP status code, request time, and user agent.
- Location: Typically
/var/log/apache2/access.logor/var/log/nginx/access.log. - Use: Analyze for sudden spikes in traffic, unusual request patterns (potential attacks), high
4xx(client errors) or5xx(server errors) status codes. Tools likeGoAccessorAWStatscan provide graphical reports.
- Error Logs: These logs record errors and warnings from your web server, PHP, and other server components.
- Location: Typically
/var/log/apache2/error.log,/var/log/nginx/error.log,/var/log/php-fpm/www-error.log(for PHP-FPM), or your custom PHP error log if you configurederror_loginphp.ini. - Use: Look for
PHP Fatal errors,Allowed memory size exhausted,mod_rewriteissues,FastCGIerrors, or any recurring warnings. These directly point to problems that need addressing.
- Database Logs (MySQL/MariaDB):
- Error Log: Records database server startup/shutdown messages, critical errors, and warnings. Typically
/var/log/mysql/error.log. - Slow Query Log: An incredibly useful log that records queries that take longer than a specified threshold to execute. Enable this (e.g.,
slow_query_log = 1,long_query_time = 2inmy.cnf) to identify and optimize inefficient database queries.
- Log Management: For busy sites, logs can grow very large. Implement log rotation (e.g., using
logrotateon Linux) to manage log file size and archive older logs.
Regular Server Updates and Security Patches
Keeping your server’s operating system, web server software, PHP, and database software up to date is non-negotiable for security and performance.
- Operating System (OS) Updates: Regular OS updates (e.g.,
apt update && apt upgradeon Debian/Ubuntu,yum updateon CentOS/RHEL) patch security vulnerabilities, improve system stability, and sometimes bring performance enhancements. - Web Server (Apache/Nginx) Updates: Update your web server software to benefit from the latest features, bug fixes, and security patches.
- PHP Updates: As discussed, moving to newer PHP versions is critical for performance and security. Ensure you’re running a currently supported version of PHP (e.g., PHP 7.4, 8.0, 8.1, 8.2).
- Database (MySQL/MariaDB) Updates: Update your database server to its latest stable version for performance improvements and security fixes.
- Security Patches: Always apply security patches as soon as they are released for all server software. Many exploits target known vulnerabilities in older software versions.
- Backup Before Updating: Always create a full server backup (or at least a backup of critical configuration files and your WordPress site) before performing major updates. Test updates on a staging environment first if possible.
Implementing Server Backups
While not strictly a configuration tip for reducing errors, a robust backup strategy is your ultimate safety net when errors do occur, or when configuration changes go wrong.
- Full Server Backups: For VPS or dedicated servers, aim for full system backups that can restore your entire server state, including OS, configurations, and data. Tools like rsync, LVM snapshots, or cloud provider snapshots can facilitate this.
- WordPress-Specific Backups: Even with full server backups, it’s wise to have separate WordPress backups (database and files).
- Plugins: Use reliable WordPress backup plugins like UpdraftPlus, BackWPup, or VaultPress.
- Manual Backups: You can manually dump your database (
mysqldump) and archive your WordPress files (tar -czf). - Backup Frequency: The frequency depends on how often your content changes. For active blogs, daily backups are a good idea. For static sites, weekly might suffice.
- Off-site Storage: Always store backups in an off-site location (e.g., cloud storage like Amazon S3, Google Drive, Dropbox) separate from your server. If your server fails completely, you don’t want your backups to be lost with it.
- Test Restorations: Periodically test your backup restoration process. A backup is only good if you can successfully restore from it.
By diligently monitoring your server, analyzing its logs, keeping software updated, and maintaining robust backups, you’re not just reducing the frequency and severity of WordPress errors, you’re building a resilient, high-performing, and secure foundation for your entire online presence.
FAQs
What are common WordPress errors related to server configuration?
Common WordPress errors related to server configuration include the “Error Establishing a Database Connection,” “500 Internal Server Error,” “403 Forbidden Error,” and “White Screen of Death.” These errors often arise from misconfigured server settings, insufficient resources, or incorrect file permissions.
How can I check my server’s PHP version for compatibility with WordPress?
You can check your server’s PHP version by creating a PHP file with the following code: . Upload this file to your WordPress root directory and access it via your web browser. The PHP version will be displayed on the page. Ensure that your PHP version is compatible with the latest version of WordPress, which typically requires PHP 7.4 or higher.
What server settings should I optimize to reduce WordPress errors?
To reduce WordPress errors, optimize server settings such as increasing PHP memory limit, adjusting max execution time, enabling gzip compression, and configuring proper file permissions. Additionally, ensure that your server has the latest versions of PHP, MySQL, and other relevant software.
How can caching improve server performance for WordPress?
Caching improves server performance by storing static versions of your web pages, reducing the load on the server and speeding up page load times. This can significantly decrease the likelihood of errors caused by server overload, especially during high traffic periods. Implementing caching plugins or server-side caching solutions can help achieve this.
What role does SSL configuration play in WordPress error reduction?
Proper SSL configuration plays a crucial role in securing data transmission between the server and users, which can prevent errors related to mixed content and insecure connections. Ensuring that your SSL certificate is correctly installed and configured can help avoid issues like the “Not Secure” warning and improve overall site reliability.









Add comment