
You’re ready to take the leap and establish your presence online, and WordPress is your chosen platform. That’s a fantastic decision! WordPress powers a significant portion of the internet, and for good reason: it’s versatile, user-friendly, and incredibly powerful. But how do you get it up and running? For many, the thought of server configurations and code can be daunting. Fortunately, with the right tools, it’s surprisingly straightforward. This guide is your roadmap to an easy WordPress installation, focusing specifically on how to leverage the power of cPanel and Softaculous, two of the most common and efficient tools for web hosting management.
You might have already heard about cPanel. It’s a widely adopted web hosting control panel that provides a graphical interface for managing your hosting account. Think of it as your command center for everything related to your website: file management, email accounts, domain settings, and, crucially for us, software installations. Inside cPanel, you’ll often find Softaculous, a one-click installer that simplifies the process of deploying a vast array of web applications, with WordPress being a star player. Together, they make the often-intimidating task of setting up WordPress feel like a breeze.
This guide will walk you through every step, from understanding what you need before you start to optimizing your WordPress installation after it’s up and running. We’ll demystify the process, ensuring that by the end, you’ll have a fully functional WordPress site ready for you to start creating and publishing. Whether you’re a complete beginner or have dabbled in web development before, this guide is designed to empower you.
Before you dive headfirst into the installation process, it’s essential to ensure you have a few key things in place. Think of these as your essential ingredients for a successful WordPress setup. Skipping these initial checks can lead to unnecessary hiccups down the line. This section will cover the foundational elements you need to have sorted.
Your Web Hosting Account
The most fundamental requirement for installing WordPress is a web hosting account. This is where your website’s files will live and from which it will be accessible on the internet. When you sign up for web hosting, you’ll typically be provided with login credentials for your cPanel account.
Choosing the Right Hosting Provider
This is a critical first step that can impact your entire online journey. Different hosting providers offer varying levels of service, performance, and pricing. For beginners, shared hosting is often the most cost-effective option. Look for providers that specifically mention cPanel and Softaculous availability, as this will greatly simplify the installation process we’re about to undertake. Some popular and reliable hosting providers include Bluehost, SiteGround, HostGator, and A2 Hosting. Consider factors like:
- Uptime Guarantee: How often is the server available? A higher uptime percentage is crucial for your website’s accessibility.
- Customer Support: Will you be able to get help if you run into trouble? 24/7 support is a big plus.
- Storage and Bandwidth: Do they offer enough space for your website’s files and enough data transfer for your expected traffic?
- Features: Do they include features like free SSL certificates, regular backups, and easy domain management?
Accessing Your cPanel
Once you’ve chosen a hosting provider and signed up, you’ll receive an email containing your login details for cPanel. This email might also include the direct URL to your cPanel login page, often something like yourdomain.com/cpanel or cpanel.yourdomain.com. Bookmark this URL, as you’ll be returning to it frequently to manage your website.
Your Domain Name
A domain name is your website’s unique address on the internet (e.g., yourwebsite.com). You’ll need to have one registered before you can install WordPress.
Registering a Domain Name
You can register a domain name through your web hosting provider, or you can use a dedicated domain registrar like GoDaddy, Namecheap, or Google Domains. If you register your domain separately from your hosting, you’ll need to point your domain’s nameservers to your hosting provider’s servers. Your hosting provider will supply you with these nameserver details.
Domain Association with Your Hosting Account
For the smoothest installation experience, your domain name should be associated with your hosting account. If you purchased your domain and hosting from the same provider, this is usually done automatically. If you purchased them separately, and you’ve pointed your nameservers correctly, cPanel will recognize your domain. When you initiate the WordPress installation via Softaculous, you’ll select this domain to install WordPress on.
Basic Understanding of Web Terms
While this guide aims to make everything simple, a basic grasp of a few terms will be beneficial. Don’t worry if you’re not an expert; we’ll keep it light.
What is a Subdomain vs. a Primary Domain?
- Primary Domain: This is the main domain associated with your hosting account. If you install WordPress directly on
yourwebsite.com, it’s on your primary domain. - Subdomain: This is an addition to your primary domain, creating a new, separate section of your site. Examples include
blog.yourwebsite.comorshop.yourwebsite.com. You can install WordPress on a subdomain if you want to test things out or create a separate, dedicated area for a specific purpose without affecting your main site. We’ll cover how to choose where to install WordPress.
What is an SSL Certificate?
An SSL (Secure Sockets Layer) certificate encrypts the connection between your website and visitors’ browsers, indicated by https:// in the address bar and a padlock icon. Most hosting providers offer free SSL certificates, and it’s highly recommended to have one installed for security and SEO benefits. Softaculous installations often give you the option to automatically install WordPress with an SSL certificate if one is available.
If you’re looking to enhance your newly installed WordPress site, you might find it beneficial to read about website security. A related article that provides valuable insights is titled “How to Improve Your Website Security: 6 Powerful Tips.” This resource offers practical advice on safeguarding your website from potential threats, ensuring that your online presence remains secure. You can check it out here: How to Improve Your Website Security: 6 Powerful Tips.
Navigating cPanel and Finding Softaculous
Now that you have your ducks in a row, it’s time to get familiar with your hosting environment. cPanel is your gateway, and Softaculous is the express lane to WordPress. This section focuses on how to locate and access these crucial tools.
Logging into Your cPanel Account
As mentioned earlier, you’ll receive your cPanel login credentials via email after signing up for hosting. Accessing cPanel is typically done through your web browser.
The Login Process
- Open your web browser: Navigate to the cPanel login URL provided by your hosting provider. This is often
yourdomain.com/cpanelor a similar subdomain. - Enter your username and password: You’ll see a login form. Carefully enter the username and password provided in your welcome email. These are case-sensitive, so pay attention to capitalization.
- Click “Log In”: If the credentials are correct, you will be directed to your cPanel dashboard.
Understanding the cPanel Interface
The cPanel dashboard is your central hub. It’s usually organized into categories like “Files,” “Databases,” “Domains,” “Email,” and “Software.” While it might look a bit overwhelming at first, you don’t need to understand every single option to install WordPress. We’ll be focusing on the “Software” or “App Installer” section.
Locating Softaculous in cPanel
Softaculous is an auto-installer that greatly simplifies the installation of various web applications, including WordPress. It’s typically integrated directly into cPanel by many hosting providers.
The “Software” or “Script” Section
Scroll through your cPanel dashboard. Look for a section labeled “Software,” “Scripts,” or something similar. Within this section, you should find an icon or link for “Softaculous Apps Installer” or a direct link to WordPress.
Identifying the Softaculous Icon
The Softaculous icon is usually prominent. It might be a stylized “S” or a magnifying glass over blocks. Hovering over icons can sometimes reveal their names. If you can’t find it visually, look for text links.
Accessing the Softaculous Installer
Once you’ve located Softaculous, click on its icon or link to launch the installer.
The Softaculous Dashboard
Upon clicking the Softaculous link, you’ll be presented with the Softaculous dashboard. This interface lists a variety of applications you can install, categorized for easy browsing. You’ll likely see sections for Blogs, Content Management Systems (CMS), E-commerce, Forums, and more.
Finding WordPress
WordPress will almost always be prominently displayed, often at the very top of the CMS or Blog category, or even as a featured application. You’ll see a WordPress icon and a button to “Install Now.” Click on this button to begin the WordPress installation process.
The Softaculous WordPress Installation Process
This is where the magic happens! Softaculous streamlines the installation of WordPress into a series of simple steps. You’ll be guided through configuring a few key settings, and then Softaculous will handle the rest.
Choosing the Installation URL
This is one of the most important decisions you’ll make during the installation. You need to decide where on your domain you want WordPress to reside.
Installing on Your Primary Domain
If you want your website to be directly accessible at yourwebsite.com (your primary domain), you’ll typically select your primary domain from the “Choose Domain” dropdown.
Installing on a Subdomain
If you’ve created a subdomain like blog.yourwebsite.com for your WordPress site, select this subdomain from the dropdown menu.
Installing in a Directory
You can also choose to install WordPress in a specific directory within your domain. For example, installing WordPress at yourwebsite.com/blog would mean you select your primary domain and then enter blog in the “In Directory” field. This is useful if you have an existing website on your primary domain and want to add a WordPress blog to a subdirectory. Important Note: If you want WordPress to be at the root of your domain (e.g., yourwebsite.com), leave the “In Directory” field blank. If you do enter a directory name, ensure it doesn’t already exist, or Softaculous might overwrite its contents.
Configuring Installation Settings
Softaculous presents you with a form to fill out, which customizes your WordPress installation.
Software Setup
- Choose Protocol: Select the protocol for your website. It’s highly recommended to use
https://orhttps://www.if you have an SSL certificate installed. If you’re unsure or don’t have SSL yet,http://orhttp://www.is the default, but you should aim to upgrade to HTTPS soon. - Choose Domain: As discussed above, select the domain or subdomain where WordPress will be installed.
- In Directory: Leave this blank for a root installation, or specify a folder name.
Site Settings
- Site Name: This is the name of your website that will appear in browser tabs and is often used in your WordPress theme’s header. You can change this later in WordPress’s general settings.
- Site Description: This is a short tagline or description for your website, often displayed under your site name. This can also be changed later.
Admin Account
This is arguably the most critical part of this section, as it ensures you can log in to your new WordPress site.
- Admin Username: Choose a username for your WordPress administrator account. Crucial Tip: Avoid using common usernames like “admin,” “administrator,” or your actual name. Opt for something unique and harder to guess for better security.
- Admin Password: Create a strong password. This should be a combination of uppercase and lowercase letters, numbers, and symbols. Softaculous usually provides a password generator; use it and save the generated password securely (e.g., in a password manager).
- Admin Email: Enter an email address that you can access. This email will be used for administrative purposes within WordPress, such as password recovery and notifications.
Choose Language
Select your preferred language for the WordPress administration area and backend.
Select Plugins (Optional)
Softaculous might pre-select a few plugins for installation. You can usually deselect any you don’t want. It’s often better to install plugins as needed later to keep your installation clean.
Advanced Options (Optional but Recommended to Review)
This section often contains more technical settings, but some are worth understanding.
- Database Name/Prefix: Softaculous will automatically create a database. You can usually leave the name as automatically generated. The database prefix (e.g.,
wp_) is a security measure. It’s good practice to change this from the defaultwp_to something less common to deter automated attacks. Softaculous often handles this with a unique prefix. - Auto Upgrade: You can choose to auto-upgrade WordPress core, plugins, and themes. While convenient, some users prefer to manually manage updates for greater control. Decide based on your comfort level.
- Backup Location and Schedule: Softaculous can be configured to automatically back up your WordPress installation. Setting up regular backups is a wise decision.
Initiating the Installation
Once you’ve reviewed and configured all the necessary settings, scroll to the bottom of the page.
The Install Button
You’ll find an “Install” button. Click it to start the automated installation process.
The Installation Progress Indicator
Softaculous will display a progress bar showing you the status of the installation. This usually takes a minute or two. It’s extracting files, creating the database, and configuring WordPress. Do not close the browser window or navigate away during this process.
Successful Installation Confirmation
Upon completion, Softaculous will display a success message, usually with links to your newly installed WordPress site and the admin login URL. Congratulations! You’ve just installed WordPress.
Post-Installation Steps: Securing and Setting Up Your WordPress Site
The installation is complete, but your work isn’t entirely done. Now it’s time to secure your new WordPress site and perform some essential initial configurations to ensure it runs smoothly and safely. Treat this as setting up your new home – you wouldn’t just walk away without checking the locks and arranging the furniture!
Accessing Your WordPress Admin Dashboard
You’ll receive the URL to your WordPress admin dashboard at the end of the Softaculous installation. It typically looks like yourdomain.com/wp-admin or yourdomain.com/wp-login.php.
Logging In
Navigate to this URL in your browser and enter the Admin Username and Admin Password you created during the Softaculous installation.
A First Look at the WordPress Dashboard
You’ll be greeted by the WordPress dashboard, also known as the backend or admin area. This is where you’ll manage all aspects of your website: creating content, installing themes and plugins, managing users, and more. Take a moment to familiarize yourself with the main menu items on the left-hand side.
Essential WordPress Settings
Before you start creating content, it’s crucial to configure some fundamental WordPress settings.
General Settings
Navigate to Settings > General in your WordPress dashboard.
- Site Title and Tagline: Double-check that your site title and tagline are correct. You can update them here at any time.
- WordPress Address (URL) and Site Address (URL): These should automatically be populated correctly based on your Softaculous installation. Ensure they are set to
https://if you have SSL enabled. - Administration Email Address: Verify that this is still an email address you have access to.
- Membership: By default, anyone can register. If you want to prevent new registrations, uncheck “Anyone can register.”
- Timezone, Date Format, Time Format: Set these according to your location and preferences. This ensures that your posts are published and scheduled at the correct times.
Permalinks
Navigate to Settings > Permalinks. Permalinks are the permanent URLs of your blog posts and pages.
- Choosing a Permalink Structure: For Search Engine Optimization (SEO) and readability, it’s highly recommended to use a structure that includes the post name. The “Post name” option (
yourdomain.com/sample-post/) is generally the best choice. - Save Changes: After selecting your preferred structure, click “Save Changes.” This process can sometimes take a moment as WordPress updates the underlying .htaccess file.
Security Best Practices
Security is paramount for any website. WordPress, being so popular, is a target for hackers. Implementing basic security measures from the start is vital.
Updating WordPress Core, Themes, and Plugins
- Automatic Updates: If you enabled auto-updates in Softaculous, WordPress will handle this automatically. However, it’s good practice to still check for updates manually periodically.
- Manual Updates: Navigate to Dashboard > Updates to check for available updates for WordPress core, themes, and plugins. Install them promptly, as updates often include security patches.
Deleting Default Content
WordPress comes with pre-installed “Hello world!” posts and sample pages. It’s a good habit to delete these.
- Posts: Go to Posts > All Posts and move the “Hello world!” post to trash.
- Pages: Go to Pages > All Pages and move the sample page to trash.
- Comments: Go to Comments and delete any sample comments.
Changing the Default Admin Username (If You Didn’t Already)
If, by chance, you used a weak username like “admin” during installation, create a new administrator account with a strong, unique username. Then, log out of the “admin” account, log in with your new administrator account, and delete the old “admin” account.
Installing a Security Plugin
Consider installing a reputable security plugin. Popular choices include:
- Wordfence Security: Offers a firewall, malware scanner, login security, and more.
- Sucuri Security: Provides security auditing, malware scanning, and hardening features.
- iThemes Security: Offers a wide range of security measures in a user-friendly interface.
These plugins require some configuration, but their default settings provide a good baseline level of security.
Essential Plugin Installations
Plugins extend the functionality of WordPress. While you can install them later as needed, a few are almost universally recommended.
Recommended Plugin Categories
- SEO Plugin: To help your website rank higher in search engines.
- Yoast SEO: The most popular SEO plugin, offering comprehensive features for on-page optimization.
- Rank Math SEO: A powerful and feature-rich alternative to Yoast.
- Backup Plugin: Even if your host provides backups, having your own is a good redundancy.
- UpdraftPlus WordPress Backup Plugin: A highly-rated plugin for scheduling and performing backups.
- Caching Plugin: To improve your website’s speed and performance.
- WP Super Cache: A simple and effective caching plugin.
- W3 Total Cache: A more advanced caching solution.
- LiteSpeed Cache: If your hosting uses LiteSpeed web servers, this is often the best and fastest option.
- Contact Form Plugin: To allow visitors to easily get in touch with you.
- Contact Form 7: A popular and flexible free option.
- WPForms: A drag-and-drop form builder that is very user-friendly.
Installing Plugins Via WordPress Admin
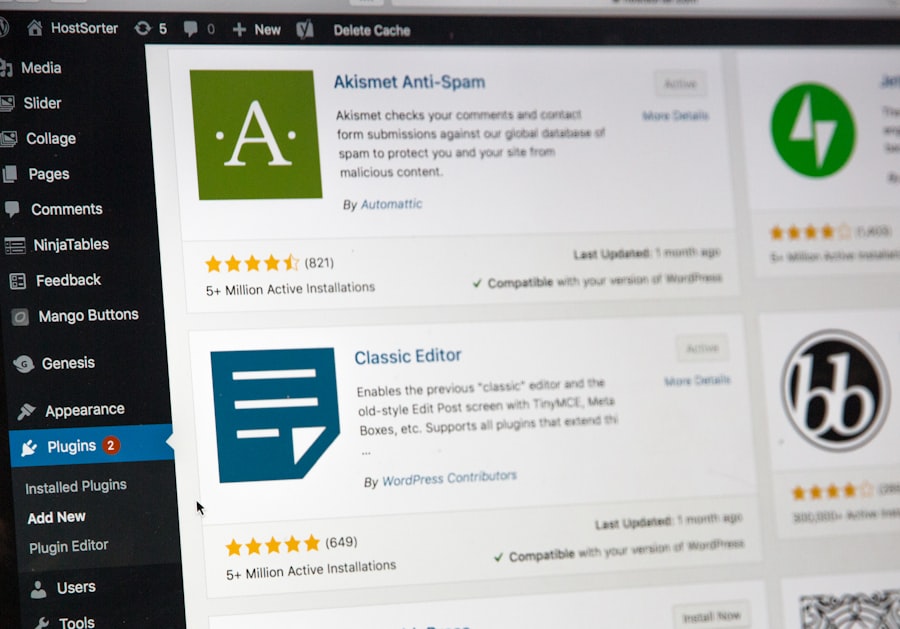
- Navigate to Plugins > Add New in your WordPress dashboard.
- Use the search bar to find the plugin you want (e.g., “Yoast SEO”).
- Click “Install Now.”
- Once installed, click “Activate.”
- Follow the plugin’s setup wizard or initial configuration steps.
If you’re looking to enhance your WordPress experience after installation, you might find it beneficial to explore strategies for optimizing your site’s performance. A great resource for this is an article that discusses how to accelerate your WordPress site by mastering Core Web Vitals, which can significantly improve user experience and search engine ranking. You can read more about it in this insightful piece on accelerating your WordPress site.
Theme Installation and Customization
| Steps | Details |
|---|---|
| Step 1 | Log in to your cPanel account |
| Step 2 | Scroll down to the ‘Softaculous Apps Installer’ section |
| Step 3 | Click on the WordPress icon |
| Step 4 | Click the ‘Install Now’ button |
| Step 5 | Fill in the WordPress installation details |
| Step 6 | Click the ‘Install’ button |
| Step 7 | WordPress is now installed and ready to use |
A WordPress theme determines the visual design and layout of your website. Choosing the right theme and customizing it to your liking is essential for creating a unique and engaging online presence.
Understanding WordPress Themes
Themes are pre-designed templates that control the look and feel of your WordPress site. They manage everything from colors and fonts to the arrangement of elements on your pages.
Free vs. Premium Themes
- Free Themes: Available from the official WordPress.org Theme Directory. They are well-tested and generally secure, but might have limited features and support.
- Premium Themes: Purchased from third-party marketplaces (like ThemeForest, Elegant Themes) or theme developers. They typically offer more advanced features, customizability, and dedicated support.
Where to Find Themes
- WordPress.org Theme Directory: Access this directly from your WordPress dashboard by going to Appearance > Themes > Add New. You can browse popular, latest, or featured themes, or search by keyword or feature.
- Third-Party Marketplaces: Websites like ThemeForest, Mojo Marketplace, and independent developer sites (e.g., Elegant Themes for Divi, StudioPress for Genesis) offer a vast selection of premium themes.
Installing a Theme
There are two primary ways to install a theme.
Method 1: Installing from the WordPress.org Theme Directory (Easiest)
- In your WordPress dashboard, navigate to Appearance > Themes.
- Click the “Add New” button at the top.
- You’ll see a grid of popular themes. You can browse, use filters (e.g., feature filter), or search for a specific theme name using the search bar in the top right.
- Hover over a theme you’re interested in. You’ll see options to “Preview” or “Install.”
- Click “Install” on the theme you want.
- After installation, the button will change to “Activate.” Click “Activate” to apply the theme to your website.
Method 2: Uploading a Theme File (for Premium or Downloaded Themes)
- If you’ve purchased a premium theme or downloaded one from another source, you’ll have a
.zipfile. Do not unzip this file. - In your WordPress dashboard, navigate to Appearance > Themes.
- Click the “Add New” button.
- Click the “Upload Theme” button at the top.
- Click the “Choose File” button and select the
.zipfile of your theme from your computer. - Click “Install Now.”
- Once the theme is installed, you’ll see an option to “Live Preview” or “Activate.” Click “Activate” to apply the theme.
Customizing Your Theme
Once your theme is activated, it’s time to make it your own.
The WordPress Customizer
The primary tool for theme customization is the WordPress Customizer.
- Navigate to Appearance > Customize in your dashboard.
- The Customizer provides a live preview of your website on the right side of the screen and a panel of customization options on the left side.
- As you make changes, you’ll see them reflected in the live preview in real-time.
Common Customization Options
The options available will vary depending on your theme, but most Customizer panels include:
- Site Identity: Upload your logo, change your site title and tagline, and set your site icon (favicon).
- Colors: Adjust the primary and secondary colors of your site, including background colors, text colors, and link colors.
- Typography: Choose fonts for your headings, body text, and other elements. Many themes offer Google Fonts integration.
- Header & Footer: Customize the layout, content, and styling of your header and footer areas. This might include adding social media links or navigation menus.
- Menus: Create and assign navigation menus to different locations within your theme (e.g., primary navigation, footer navigation).
- Widgets: Add content blocks (like recent posts, categories, or a search bar) to specific widget areas (e.g., sidebar, footer).
- Homepage Settings: Choose whether your homepage displays your latest posts or a static page that you create.
- Additional CSS: For users with some CSS knowledge, this allows you to add custom CSS rules to override or enhance the theme’s default styling.
Saving Your Customizations
After you’ve made your desired changes, click the “Publish” button at the top of the Customizer panel to save them. If you want to save your changes without making them public yet, you can click the gear icon next to “Publish” and select “Save Draft.”
Content Creation: Pages vs. Posts
Understanding the difference between WordPress “Pages” and “Posts” is fundamental for organizing your content.
WordPress Posts
- Purpose: Posts are typically used for dynamic content like blog articles, news updates, or announcements. They are usually displayed in chronological order on your blog page.
- Features: Posts can be assigned categories and tags for organization, and they have comment sections enabled by default.
WordPress Pages
- Purpose: Pages are for static, evergreen content that doesn’t change frequently. Examples include an “About Us” page, a “Contact Us” page, a “Services” page, or a landing page.
- Features: Pages do not have categories or tags, and comments are typically disabled by default. They are hierarchical, meaning you can create sub-pages (e.g., a “Contact Us” page could have a sub-page for “Support Requests”).
Creating Your First Page or Post
- Navigate to Posts > Add New or Pages > Add New in your dashboard.
- You’ll be taken to the WordPress editor (either the Block Editor/Gutenberg or the Classic Editor, depending on your setup).
- Enter a title for your page or post.
- Start adding content using the editor: text, images, videos, headings, lists, etc. The Block Editor makes this very intuitive with its block-based system.
- On the right sidebar, you’ll find options to:
- For Posts: Assign categories, add tags, set a featured image.
- For Pages: Set a parent page, choose a template (if your theme supports it).
- When you’re ready, click “Publish.”
If you’re looking to enhance your newly installed WordPress site, you might find it beneficial to explore some essential security measures. A great resource for this is the article on the latest website security best practices, which provides valuable insights into protecting your site from potential threats. You can read more about these practices in this informative piece here. Implementing these strategies will help ensure that your WordPress installation remains secure and runs smoothly.
Troubleshooting Common Installation Issues
Even with the simplicity of Softaculous, occasional snags can occur. This section addresses common problems you might encounter and provides straightforward solutions.
Installation Fails or Completes with Errors
Sometimes, the automated process might stumble. Don’t panic; investigate!
Common Causes and Solutions
- Incomplete or Corrupted Download: This can happen if your internet connection dropped during the download of WordPress files.
- Solution: Rerun the Softaculous installation. If it fails again, try clearing your browser’s cache and cookies.
- Database Issues: Problems creating or accessing the database can halt the installation.
- Solution: Check your hosting control panel to ensure you haven’t exceeded your database limit. You might need to contact your hosting provider to check database server status or for assistance with database permissions.
- File Permissions: Incorrect file or folder permissions on your server can prevent Softaculous from writing files.
- Solution: This is a more advanced issue. If you suspect this, you’ll likely need to contact your hosting provider for them to check and correct server permissions.
- Existing Files Conflict: If you tried to install WordPress in a directory that already contains files or folders with the same names, it can cause conflicts.
- Solution: Ensure the “In Directory” field in Softaculous is either blank or points to an empty folder. If you’ve made previous attempts, use your cPanel File Manager to delete any leftover WordPress files and directories before retrying the installation.
“Error Establishing a Database Connection”
This is a very common WordPress error that appears after installation, but it’s worth mentioning as it can sometimes stem from installation issues. It means WordPress can’t communicate with its database.
Common Causes and Solutions
- Incorrect Database Credentials: The
wp-config.phpfile (which contains your database name, username, password, and host) might have incorrect information. - Solution: Access your hosting account via cPanel. Go to File Manager and navigate to the root directory of your WordPress installation (where
wp-config.phpis located). Download, edit, and re-uploadwp-config.phpwith the correct database details. You can find these details in your cPanel’s MySQL Databases section, where you created your database user and assigned them privileges. - Database Server is Down: The database server itself might be offline.
- Solution: Contact your hosting provider. They can confirm if the database server is operational.
- Corrupted Database: In rare cases, the database can become corrupted.
- Solution: This usually requires your hosting provider to restore the database from a backup or repair it.
My Website is Showing a 404 Error (Page Not Found)
This means a requested page or resource cannot be found on the server.
Common Causes and Solutions
- Incorrect Permalinks: The permalink structure might be misconfigured.
- Solution: Go to Settings > Permalinks in your WordPress dashboard. Without changing anything, simply click the “Save Changes” button. This often re-generates the
.htaccessfile, which controls how your URLs work. - Missing
.htaccessFile: The.htaccessfile is crucial for WordPress permalinks. - Solution: Ensure you have the “Show Hidden Files” option enabled in your cPanel File Manager. Locate the
.htaccessfile in your WordPress root directory. If it’s missing, manually create a new one by copying the default WordPress.htaccesscode (which you can find by searching “WordPress default .htaccess” online) and pasting it into a new file named.htaccessin your WordPress root. - Plugin or Theme Conflict: A recently installed plugin or theme might be causing a conflict.
- Solution: If you recently installed a plugin or theme, deactivate it. If that resolves the issue, you’ve found the culprit. You can then try reinstalling it or contacting the plugin/theme developer for support.
“Internal Server Error” (500 Error)
This is a generic server error that is often due to a problem with the server configuration or a plugin/theme issue.
Common Causes and Solutions
- Corrupted
.htaccessFile: A malformed.htaccessfile is a frequent cause. - Solution: Rename your
.htaccessfile to.htaccess_backupvia cPanel File Manager. Then, go to Settings > Permalinks in WordPress and save changes to regenerate a clean.htaccessfile. - PHP Memory Limit Exceeded: The script may be trying to use more memory than allocated.
- Solution: You can increase the PHP memory limit by editing the
wp-config.phpfile, adding the linedefine('WP_MEMORY_LIMIT', '256M');before the line that says/ That's all, stop editing! Happy publishing. /. Alternatively, contact your hosting provider to increase it for you. - Plugin or Theme Conflict: Similar to the 404 error, a faulty plugin or theme can cause this.
- Solution: Rename the
pluginsfolder withinwp-contentvia cPanel File Manager toplugins_old. If your site loads, then a plugin was the issue. Reactivate them one by one to find the problematic one. If renaming plugins doesn’t help, try renaming your theme’s folder.
How to Get Help
If you’ve exhausted these troubleshooting steps and are still facing issues, don’t hesitate to reach out for help.
- Hosting Provider’s Support: Your first point of contact should always be your web hosting provider. They have direct access to your server and can diagnose many server-side issues.
- WordPress Support Forums: The official WordPress.org support forums (wordpress.org/support/forums/) are a treasure trove of information and community assistance.
- Plugin/Theme Developer Support: If you suspect a specific plugin or theme is the issue, check their dedicated support forums or contact them directly.
Conclusion: Your WordPress Journey Begins Now!
You’ve navigated the process of easy WordPress installation using cPanel and Softaculous, from understanding the prerequisites to troubleshooting potential issues. This journey has equipped you with the foundational knowledge to get your website up and running smoothly. Remember, the installation is just the beginning of an exciting and creative process.
We’ve covered:
- Understanding Your Prerequisites: The essential groundwork, including your hosting account, domain name, and basic web terms.
- Navigating cPanel and Finding Softaculous: how to access your hosting control panel and locate the powerful one-click installer.
- The Softaculous WordPress Installation Process: The step-by-step guide to configuring and launching WordPress with ease.
- Post-Installation Steps: Crucial configurations for security, settings, and essential plugins, as well as an introduction to theme installation and customization.
- Troubleshooting Common Installation Issues: Practical solutions to common problems you might encounter, ensuring you can resolve them quickly.
The beauty of WordPress lies in its flexibility and extensibility. Now that you have a functioning WordPress site, you can begin populating it with your unique content, refining its design with themes and customization, and adding features with plugins. Whether you’re building a personal blog, a business website, an e-commerce store, or a portfolio, WordPress provides the robust platform you need.
Don’t be afraid to experiment. Explore the WordPress dashboard, try out different themes, and test out plugins. The WordPress community is vast and supportive, with countless resources available online to help you along the way. Your online presence is just a few clicks away, and with this guide, you’ve successfully taken that crucial first step. Congratulations, and happy building!
FAQs
What is WordPress?
WordPress is a popular content management system (CMS) that allows users to create and manage websites easily. It is known for its user-friendly interface and customizable features.
What is cPanel?
cPanel is a web hosting control panel that provides a graphical interface and automation tools designed to simplify the process of hosting a website. It allows users to manage their website, email accounts, and other aspects of web hosting.
What is Softaculous?
Softaculous is a script installer that automates the installation of web applications, such as WordPress, on a website. It provides a user-friendly interface for installing, updating, and managing various web applications.
How do I install WordPress with cPanel and Softaculous?
To install WordPress with cPanel and Softaculous, you can log in to your cPanel account, navigate to the Softaculous Apps Installer section, and select WordPress. Then, follow the on-screen instructions to complete the installation process.
What are the benefits of using cPanel and Softaculous to install WordPress?
Using cPanel and Softaculous to install WordPress offers several benefits, including a user-friendly interface, automated installation process, and easy management of WordPress updates and backups. It also provides access to a wide range of plugins and themes for customizing your WordPress website.








Add comment