
Why Backups are Your Website’s Digital Seatbelt
Imagine spending countless hours crafting your perfect WordPress website, pouring your creativity and hard work into every page, post, and product. Now, imagine all of that disappearing in an instant. A malicious attack, a server crash, a botched plugin update, or even a simple human error can wipe out your entire digital presence. This isn’t a doomsday scenario; it’s a very real possibility that many website owners face. This is precisely why understanding and implementing a robust WordPress backup strategy isn’t just a good idea – it’s an absolute necessity.
Think of your website as a physical store. You wouldn’t leave your inventory, customer records, and financial documents unsecured, vulnerable to theft or destruction, would you? Your WordPress website is no different. It represents your brand, your business, and often, your livelihood. A reliable backup acts as your digital insurance policy, a safety net that allows you to recover quickly and minimize downtime should the unthinkable happen. Without one, you’re essentially operating without a safety net, one misstep away from a potentially catastrophic loss. This guide will walk you through the essential steps and considerations for creating a comprehensive backup strategy, ensuring your precious website data is always protected.
To further enhance your website’s security and ensure your data is well-protected, you may find it beneficial to read the article on shared hosting plans and their effectiveness in safeguarding your information. This resource provides a comprehensive overview of essential security measures to consider, which complements the insights from the WordPress Backup Guide. For more details, check out the article here: Is Your Shared Hosting Plan Protecting Your Data? The 2025 Security Checklist.
Understanding What Needs Backing Up

Before you dive into the “how,” it’s crucial to understand “what” constitutes your WordPress website and therefore, what needs to be backed up. It’s more than just the pretty pictures and text you see. Your WordPress installation is a complex ecosystem comprised of several key components, each equally vital for its functionality. Overlooking even one of these can lead to an incomplete or unusable restoration.
Your WordPress Core Files
These are the fundamental files that make WordPress, well, WordPress. They include the wp-admin directory (the backend administration area), the wp-includes directory (core functions and libraries), and various root files like index.php, wp-config.php, wp-load.php, and wp-settings.php. While you generally don’t modify these files directly, they are essential for the WordPress platform to operate. If these are corrupted or lost, your website will simply cease to function.
Your WordPress Database
This is arguably the most critical component of your WordPress site. The database stores all your dynamic content: your posts, pages, comments, user information, plugin settings, theme options, and much more. Every piece of information that changes on your site is typically stored here. Without your database, your website would be a blank canvas, even if you had all your files perfectly intact. Losing your database means losing all your content and user data, which is often irrecoverable if not backed up.
Your wp-content Directory
This directory is where all your unique website assets reside. It’s where WordPress stores:
Themes
Your chosen theme dictates the look and feel of your website. Any customizations you’ve made to your theme (especially if you’re using a child theme) are stored within this directory. Losing your theme means losing your website’s design and potentially hours of customization work.
Plugins
Plugins extend the functionality of your WordPress site, adding features like contact forms, SEO tools, e-commerce capabilities, and security enhancements. The plugin files themselves are stored here, along with their associated settings (though many plugin settings are stored in the database). Without your plugins, your site might lose critical functionality.
Uploads
This is where all your media files – images, videos, audio files, PDFs – are stored. Every time you upload an image to a post or page, it goes into the wp-content/uploads folder. Losing this directory means losing all the visual and auditory content that enriches your website. Imagine a blog without its featured images, or a portfolio site without its work samples.
Choosing Your Backup Method
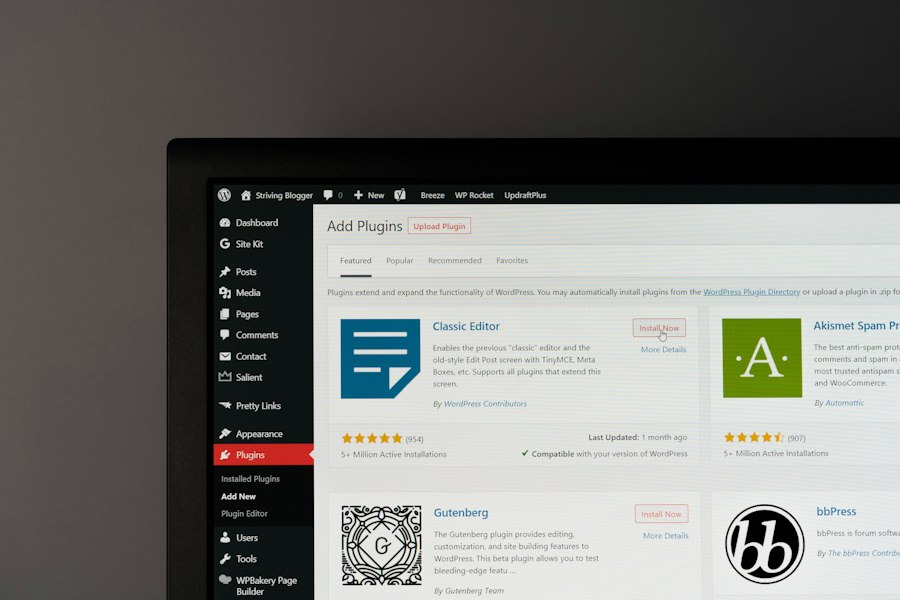
With a clear understanding of what needs backing up, the next step is to decide how you’re going to do it. There isn’t a one-size-fits-all solution; the best method for you will depend on your technical comfort level, your website’s size and complexity, and your budget. You can generally categorize backup methods into three main types: manual, plugin-based, and hosting-based.
Manual Backups
For those who are more technically inclined or prefer complete control, manual backups are a viable option. This method involves directly accessing your website’s files and database.
Backing Up Files Manually
You’ll typically use an FTP (File Transfer Protocol) client like FileZilla or your hosting provider’s file manager to download all your WordPress files. This includes the core WordPress files, your wp-content directory (themes, plugins, uploads), and any other custom files you might have. Ensure you download the entire WordPress installation directory. This process can be time-consuming for larger websites, and it requires you to remember to do it regularly.
Backing Up Your Database Manually
Your database can be backed up using phpMyAdmin, a web-based tool usually accessible through your hosting control panel (like cPanel).
- Log into your cPanel (or equivalent).
- Find and click on “phpMyAdmin.”
- Select your WordPress database from the left sidebar.
- Click on the “Export” tab.
- Choose the “Custom” export method for more options.
- Select all tables.
- Ensure the output format is “SQL.”
- Check “Add DROP TABLE / VIEW / PROCEDURE / FUNCTION / EVENT / DEFINER / TRIGGER statement.” This ensures that when you restore, existing tables are dropped first, preventing conflicts.
- Choose “gzipped” or “zipped” compression for smaller file sizes.
- Click “Go” to download the
.sqlfile.
While manual backups offer granular control, they are prone to human error, can be tedious, and require consistent effort to maintain a regular schedule.
Plugin-Based Backups
This is by far the most popular and recommended method for most WordPress users. Backup plugins automate the entire process, making it significantly easier to schedule, perform, and restore backups. There are many excellent options available, both free and premium.
Popular Backup Plugins
- UpdraftPlus: One of the most popular free backup plugins, UpdraftPlus allows you to back up your files and database to various remote storage locations like Dropbox, Google Drive, Amazon S3, and more. It offers scheduled backups and easy restoration. The premium version adds incremental backups, database encryption, and more storage options.
- Duplicator: While primarily known for website migration, Duplicator also excels at creating full site backups. It packages your entire WordPress site (files and database) into a single zip file, making it easy to download and store. The Pro version offers scheduled backups and cloud storage integration.
- BackWPup: Another robust free option, BackWPup allows you to schedule complete WordPress backups and store them in various locations, including Dropbox, Amazon S3, FTP, and email. It also supports database optimization and repair.
- Solid Backups (formerly BackupBuddy): A premium plugin from iThemes, Solid Backups offers comprehensive backup solutions, including scheduled backups, remote storage, malware scanning, and easy restoration. It’s known for its reliability and extensive feature set.
- WP Migrate DB Pro (with Addons): While its core function is database migration, its “Media Files” and “File Exclusions” addons allow for comprehensive site backups, especially useful for developers needing precise control over what’s included.
Key Features to Look for in a Backup Plugin
When choosing a plugin, consider these features:
- Full Site Backups: The ability to back up both your database and all your WordPress files.
- Scheduled Backups: Automation is key. You should be able to set daily, weekly, or monthly backups.
- Remote Storage Options: Storing backups on the same server as your website is risky. Look for integration with cloud storage services (Dropbox, Google Drive, Amazon S3, etc.) or FTP.
- Easy Restoration: The plugin should provide a straightforward process to restore your website from a backup.
- Incremental Backups: (Premium feature) This saves only the changes made since the last full backup, saving disk space and time.
- Exclude Files/Folders: The ability to exclude non-essential files (like cache folders) from backups.
- Support: Good customer support is invaluable if you encounter issues.
Hosting-Based Backups
Many web hosting providers offer their own backup solutions. These can range from basic daily backups to more sophisticated systems with one-click restore options.
Advantages of Hosting Backups
- Convenience: Often integrated directly into your hosting control panel, making them easy to access.
- Server-Level: Backups are often taken at the server level, which can sometimes be faster and more comprehensive as they don’t rely on WordPress itself to function.
- Included in Plan: Many hosts include basic backup services as part of their hosting packages.
Disadvantages of Hosting Backups
- Frequency: The frequency of these backups can vary greatly. Some hosts only take weekly backups, which might not be enough for actively updated sites.
- Retention: How long backups are stored also varies. Some might only keep the last few days, meaning you might not have access to an older, clean version if needed.
- Access/Control: You might have less control over what’s backed up or where it’s stored. Restoring might require contacting support, which can add to recovery time.
- Not a Replacement: While helpful, relying solely on hosting backups is generally not recommended. It’s best to use them as an additional layer of protection, not your primary backup strategy. If your host goes down or has an issue, your backups might be inaccessible.
Implementing Your Backup Strategy
Choosing a method is only half the battle; actually implementing a consistent and reliable backup strategy is where true protection lies. This involves several critical considerations beyond just running a backup.
Backup Frequency: How Often is Enough?
The ideal backup frequency depends entirely on how often your website changes.
- Highly Dynamic Sites (e-commerce, busy blogs, forums): If you’re publishing new content multiple times a day, processing orders, or experiencing frequent user interactions, daily backups are a must. In some cases, even hourly backups might be justified.
- Moderately Dynamic Sites (weekly blog posts, occasional updates): For sites with regular but not constant updates, weekly backups are usually sufficient.
- Static Sites (brochure sites, portfolios with infrequent changes): Monthly backups might be acceptable for sites that rarely change, but even then, consider weekly for peace of mind.
Remember, the goal is to minimize data loss. If you back up weekly and a disaster strikes on day 6, you’ve lost 6 days of work.
Where to Store Your Backups: The “Off-Site” Rule
Storing your backups on the same server as your website is like keeping your spare house key under the doormat – convenient, but useless if the whole house burns down. If your server crashes, gets hacked, or experiences a data center failure, both your website and your backups will be lost.
Always store your backups in an off-site location. Popular options include:
- Cloud Storage Services: Dropbox, Google Drive, Amazon S3, Microsoft OneDrive, DigitalOcean Spaces. These are highly reliable, offer versioning, and are often integrated directly with backup plugins.
- External Hard Drives: A good option for local storage, but ensure you store it securely and not in the same physical location as your computer/server.
- Another Server/SFTP: If you have access to another secure server, you can transfer backups there via SFTP.
Aim for a “3-2-1 rule” approach if possible:
- 3 copies of your data: Your live site, and at least two backups.
- 2 different storage types: e.g., one on cloud, one on an external drive.
- 1 off-site copy: At least one backup stored physically away from your main site/computer.
Testing Your Backups: Don’t Assume They Work
This is perhaps the most overlooked but crucial step in any backup strategy. A backup is only as good as its ability to be restored. Many website owners diligently create backups only to discover, when disaster strikes, that the backup files are corrupted, incomplete, or simply don’t work.
How to test your backups:
- Set up a Staging Environment: The safest way to test a restoration is on a staging site or a local development environment (like Local by Flywheel, XAMPP, or MAMP). This is a clone of your live site where you can experiment without affecting your production website.
- Perform a Full Restore: Use your chosen backup method (plugin, manual, hosting) to restore your website onto the staging environment.
- Thoroughly Check the Restored Site:
- Navigate through all your main pages and posts.
- Check if images and other media files are loading correctly.
- Test forms and other interactive elements.
- Log in to the WordPress admin panel and check plugin and theme settings.
- If it’s an e-commerce site, simulate a purchase.
- Repeat Regularly: Don’t just test once. Schedule regular backup tests (e.g., quarterly) to ensure your backup process remains robust as your site evolves.
Testing ensures that when you truly need your backup, it will perform as expected, saving you from potential panic and extended downtime.
To ensure the safety of your website data, it’s essential to not only follow a comprehensive WordPress Backup Guide but also to stay informed about the latest security measures. For instance, you can enhance your site’s protection by exploring the insights shared in a related article on the 12 latest website security best practices for 2023. This resource provides valuable tips that complement your backup strategy, helping you safeguard your online presence effectively. You can read more about these practices here.
Restoration: Bringing Your Website Back to Life
| Backup Method | Frequency | Storage Location | Ease of Use | Cost | Recommended For |
|---|---|---|---|---|---|
| Manual Backup via cPanel | Weekly | Local Computer / External Drive | Moderate | Free | Advanced Users |
| WordPress Backup Plugins (e.g., UpdraftPlus) | Daily or Weekly | Cloud Storage (Google Drive, Dropbox) | Easy | Free / Premium Options | All Users |
| Hosting Provider Backup Services | Daily | Hosting Server | Very Easy | Included / Add-on | Beginners & Businesses |
| Automated Backup via WP-CLI | Customizable | Server or Remote Storage | Advanced | Free | Developers & Sysadmins |
The moment of truth for any backup strategy is when you actually need to use it. Knowing how to restore your website quickly and efficiently is paramount to minimizing downtime and data loss. The restoration process will largely depend on the backup method you chose.
Restoring with a Backup Plugin
Most reputable backup plugins are designed with ease of restoration in mind.
- Access Your WordPress Admin (if possible): If your site is just partially broken, you might be able to log into wp-admin. Install and activate your backup plugin.
- Navigate to the Plugin’s Restore Section: Usually found within the plugin’s menu in your dashboard.
- Select the Backup File: The plugin will typically list available backup files, either stored locally or pulled from your remote storage. Choose the desired safe backup point.
- Initiate Restoration: Follow the plugin’s prompts, which usually involve selecting what you want to restore (files, database, or both) and confirming the action. The plugin will then begin restoring your site.
- If WordPress is Completely Down: If you can’t access your WordPress admin, you’ll need a different approach. Many plugins provide a “manual restore” method. This often involves:
- Uploading a special restoration script provided by the plugin to your site’s root directory via FTP.
- Accessing that script via your web browser (e.g.,
yourdomain.com/restore-script.php). - Following the script’s instructions to upload your backup files and perform the restoration.
Always refer to your specific plugin’s documentation for precise restoration steps.
Restoring Manually
Manual restoration is more involved and requires some technical understanding.
Restoring Files Manually
- Connect via FTP/SFTP: Use your FTP client (e.g., FileZilla) to connect to your web server.
- Delete Existing/Corrupted Files (Optional but Recommended): For a clean slate, you might consider deleting all WordPress files from your public_html or root directory except your backup files, if you have a full separate backup. Be extremely careful here.
- Upload Backup Files: Upload all the WordPress files from your backup copy to your server’s root directory. This usually involves replacing existing files or uploading to an empty directory.
Restoring Your Database Manually
- Access phpMyAdmin: Log into your hosting control panel and open phpMyAdmin.
- Select Your Database: Choose the database associated with your WordPress site.
- Drop Existing Tables (Careful!): In the “Operations” or “Structure” tab, you can select all tables and choose “Drop” to remove existing data. Ensure you are in the correct database before doing this, as it is irreversible.
- Import Your Backup:
- Click on the “Import” tab.
- Click “Choose File” and select your
.sqlbackup file. - Ensure the character set is correct (usually UTF-8).
- Click “Go” to start the import process. This will populate your database with the data from your backup.
After restoring both files and the database, clear your website’s cache (if you use a caching plugin) and your browser cache. Then, thoroughly check your website to ensure everything is functioning correctly.
Restoring with Hosting Provider Backups
If you rely on your hosting provider’s backups, the restoration process is typically straightforward:
- Log into Your Hosting Control Panel: Find the “Backups,” “Restore,” or similar section.
- Select the Restore Point: You’ll usually be presented with a list of available backup dates. Choose the one you wish to revert to.
- Initiate Restore: Follow the prompts. Some hosts offer full account restores, while others allow you to restore individual files or databases.
This process might take some time, depending on your host and the size of your website. If you have any doubts, contact your hosting provider’s support team for assistance.
To ensure the safety of your website data, it’s essential to follow a comprehensive WordPress Backup Guide. Regular backups can protect your content from unexpected issues, but you might also want to explore other ways to enhance your site’s performance. For instance, consider how dedicated servers can significantly improve your website’s capabilities. You can read more about this in the article on unleashing your website’s full potential with dedicated servers.
Best Practices and Maintenance
Setting up your backup system is a significant step, but maintaining its effectiveness requires ongoing attention. A robust backup strategy isn’t a “set it and forget it” task; it’s a continuous process of vigilance and refinement.
Regular Backup Audits
Don’t just assume your backups are running. Periodically log into your backup plugin or check your remote storage to confirm that new backup files are being created on schedule. Look for any error notifications from your plugin or hosting provider. An audit might reveal storage space issues, authentication problems with your cloud service, or other errors that prevent successful backups.
Keep a Log of Changes
If you’re making significant changes to your website (e.g., major theme overhaul, installing critical new plugins, updating WordPress core), it’s a good idea to perform a manual backup before making those changes. This gives you an immediate recovery point just in case something goes wrong. Note down the date and what changes were made.
Secure Your Backup Storage
Your backups contain a complete copy of your website, including potentially sensitive user data, private content, and configuration files. Ensure that your remote storage locations (cloud services, FTP servers) are secured with strong, unique passwords and, where available, two-factor authentication (2FA). If your backup storage is compromised, it’s as bad as your live site being hacked.
Update Your Backup Tools
Ensure your backup plugin is always up to date. Plugin developers frequently release updates that include bug fixes, security patches, and compatibility improvements with the latest WordPress versions. Running an outdated backup plugin can lead to
unreliable backups or create vulnerabilities.
Consider Incremental Backups
If your backup plugin offers incremental backups, utilize them. After an initial full backup, incremental backups only save the files that have changed since the last backup. This significantly reduces backup time, server load, and storage space, making it feasible to perform more frequent backups (e.g., hourly) without consuming excessive resources.
Store Multiple Backup Versions
Don’t just keep the latest backup. Retain several older versions of your backups (e.g., the last 7 daily backups, the last 4 weekly backups, and the last 3 monthly backups). This is crucial because sometimes a problem might go unnoticed for a while (e.g., a malware infection that isn’t immediately detected). Having older backup versions allows you to roll back to a point before the issue occurred. Many backup plugins automatically manage the deletion of old backups based on your configuration.
By diligently following these best practices, you transform your backup strategy from a mere task into a robust, proactive defense mechanism, ensuring the longevity and resilience of your WordPress website. Your website is an investment; protect it like one.
FAQs
Why is it important to backup a WordPress website?
Backing up a WordPress website is crucial to protect your data in case of hacking, server crashes, or accidental deletion. Regular backups ensure that you can restore your website quickly and easily.
How often should I backup my WordPress website?
It is recommended to backup your WordPress website at least once a week. However, if you frequently update content or make changes to your site, consider backing up more frequently to avoid losing important data.
What are the different methods to backup a WordPress website?
There are several methods to backup a WordPress website, including using plugins like UpdraftPlus or BackupBuddy, manually backing up files via FTP, or using your web hosting provider’s backup services. Choose a method that best suits your needs and technical expertise.
Where should I store my WordPress backups?
It is advisable to store your WordPress backups in multiple locations for added security. Consider storing backups on cloud storage services like Google Drive, Dropbox, or Amazon S3, as well as on an external hard drive or a different server.
How can I test if my WordPress backups are working?
To ensure that your WordPress backups are working properly, you can test the restoration process on a staging site or a local server. This will help you verify that your backups are complete and can be successfully restored in case of an emergency.









Add comment